Plywood Sheet Sizes in India: 8x4, 7x4, 6x4 & How to Choose the Right Size
Know standard plywood sheet sizes in India (8x4, 7x4, 6x4 and more). Learn where each size is used and how to reduce wastage and cost.
Quick Decision Summary
Best answer in one line: For most Indian furniture and interior projects, the 8×4 feet (2440×1220 mm) plywood sheet offers the best balance of coverage, availability, and reduced wastage.
If you're in a hurry: Standard plywood in India comes in three main sizes—8×4 feet (most common), 7×4 feet (regional preference), and 6×4 feet (smaller projects). The 8×4 sheet suits wardrobes, kitchen cabinets, and large furniture because carpenters can extract maximum panels with minimal cuts. Choose 7×4 or 6×4 only when ceiling heights are lower, transport is restricted, or your design calls for smaller components. Always calculate your cutting layout before ordering to avoid paying for plywood that ends up as scrap.
- Choose 8×4 if: You're building standard wardrobes, kitchen modules, or full-height shutters and want minimum joints.
- Choose 7×4 or 6×4 if: Your ceiling is under 8 feet, staircase access is narrow, or you're making small furniture pieces.
- Avoid oversized sheets if: Your carpenter lacks space to handle them or transport to upper floors is difficult.
What Plywood Sheet Sizes Actually Mean in the Indian Market
Plywood sheet sizes in India follow a length × width convention measured in feet, with thickness stated separately in millimetres. The "8×4" notation means 8 feet long and 4 feet wide—approximately 2440 mm × 1220 mm in metric terms. This sizing convention originated from international standards but has been adapted to suit Indian construction practices, ceiling heights, and furniture dimensions.
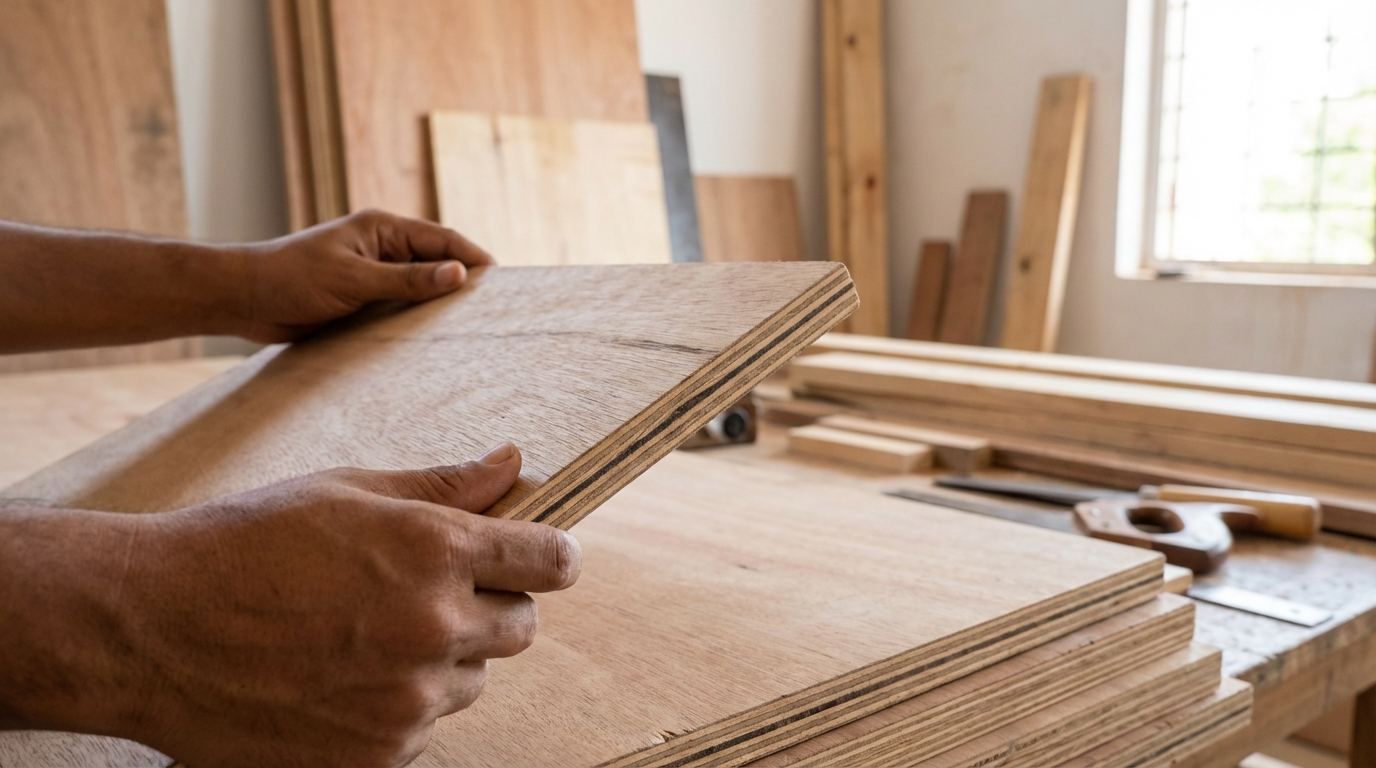
Thickness is independent of sheet size and typically ranges from 4 mm to 25 mm depending on application. A "19 mm BWR 8×4" sheet, for example, means a boiling water resistant grade plywood measuring 8 feet by 4 feet with 19 mm thickness—suitable for wardrobe carcasses and kitchen cabinets.
Where People Get Confused About Plywood Sizes
- Feet vs millimetres: Some dealers quote in feet (8×4), others in millimetres (2440×1220). Both refer to the same sheet, but always confirm units before ordering.
- Actual vs nominal size: Manufactured sheets may vary by 5–15 mm from stated dimensions due to edge trimming and calibration. Budget for this tolerance in tight-fit applications.
- Size vs thickness confusion: Buyers often mix up sheet dimensions with thickness. Size determines coverage area; thickness determines strength and application suitability.
- Regional naming: In some South Indian markets, 7×4 sheets are called "standard" while 8×4 is called "full size." Clarify dimensions in feet or millimetres, not local names.
- Square feet vs sheet count: Quotes may come per sheet or per square foot. An 8×4 sheet equals 32 square feet; a 6×4 sheet equals 24 square feet. Misreading this inflates your cost estimate.
Standard Plywood Sheet Sizes Available in India
| Size (Feet) | Size (mm) | Area (Sq Ft) | Common Applications | Availability |
|---|---|---|---|---|
| 8×4 | 2440×1220 | 32 | Wardrobes, kitchen cabinets, full-height shutters, partitions | Widely available across India |
| 7×4 | 2135×1220 | 28 | Rooms with lower ceilings, regional furniture standards | Common in South India, select Northern markets |
| 6×4 | 1830×1220 | 24 | Small furniture, study tables, shelving, false ceiling frames | Available on request, less stocked |
| 6×3 | 1830×915 | 18 | Compact furniture, drawer components, backing panels | Limited availability, often cut from larger sheets |
| 4×4 | 1220×1220 | 16 | Specialty applications, small projects | Rare, usually custom-cut |
Why Is 8×4 the Most Common Size in India?
The 8×4 feet dimension aligns with standard Indian room heights of 9–10 feet, allowing full-height wardrobe panels to be cut from a single sheet with minimal wastage. Kitchen base and wall units also optimise well from this size—a standard 2-feet-deep base unit extracts two carcass sides from one sheet width, while the length accommodates multiple components.
Additionally, plywood manufacturing machinery is calibrated for 8×4 production, making it the most cost-efficient size per square foot. Dealers stock this size in bulk, ensuring better availability and often slightly lower rates compared to non-standard dimensions.
India-Specific Reality Check
Selecting plywood sheet size in India involves practical constraints that differ from textbook recommendations. Site access, monsoon storage challenges, and regional ceiling standards all influence which size actually works for your project.
Monsoon and Storage Considerations
Large 8×4 sheets require adequate covered storage space. In humid coastal regions like Mumbai, Chennai, or Kochi, even BWR-grade plywood can absorb moisture at edges if sheets are stacked on damp floors or stored outdoors during monsoon. Smaller sheets like 6×4 are easier to store in compact godowns but may increase per-square-foot cost and joint count in large furniture.
Transport and Site Access Challenges
Many Indian homes, especially in older buildings and narrow-lane urban areas, have tight staircases and small lift sizes. An 8-foot sheet cannot fit into a standard 6-foot elevator or negotiate a 90-degree staircase landing. In such cases, 7×4 or 6×4 sheets become necessary regardless of design preference. Always measure your access points before ordering full-size sheets.
Regional Ceiling Height Variations
Standard ceiling heights vary across India—8.5 to 9 feet in North Indian metros, often 9.5 to 10 feet in South Indian cities, and as low as 7.5 feet in some older Mumbai apartments. If your ceiling is 8 feet, an 8-foot sheet leaves no margin for loft clearance or scribing adjustments. A 7×4 sheet may actually yield less wastage in such situations.
Carpenter Workspace Realities
On-site fabrication in Indian homes often happens in verandas, parking areas, or living rooms during renovation. Large sheets need adequate space for marking, cutting, and manoeuvring. If your carpenter lacks a proper workspace, handling 8×4 sheets increases the risk of edge damage and inaccurate cuts.
How to Choose the Right Plywood Sheet Size in 5 Steps
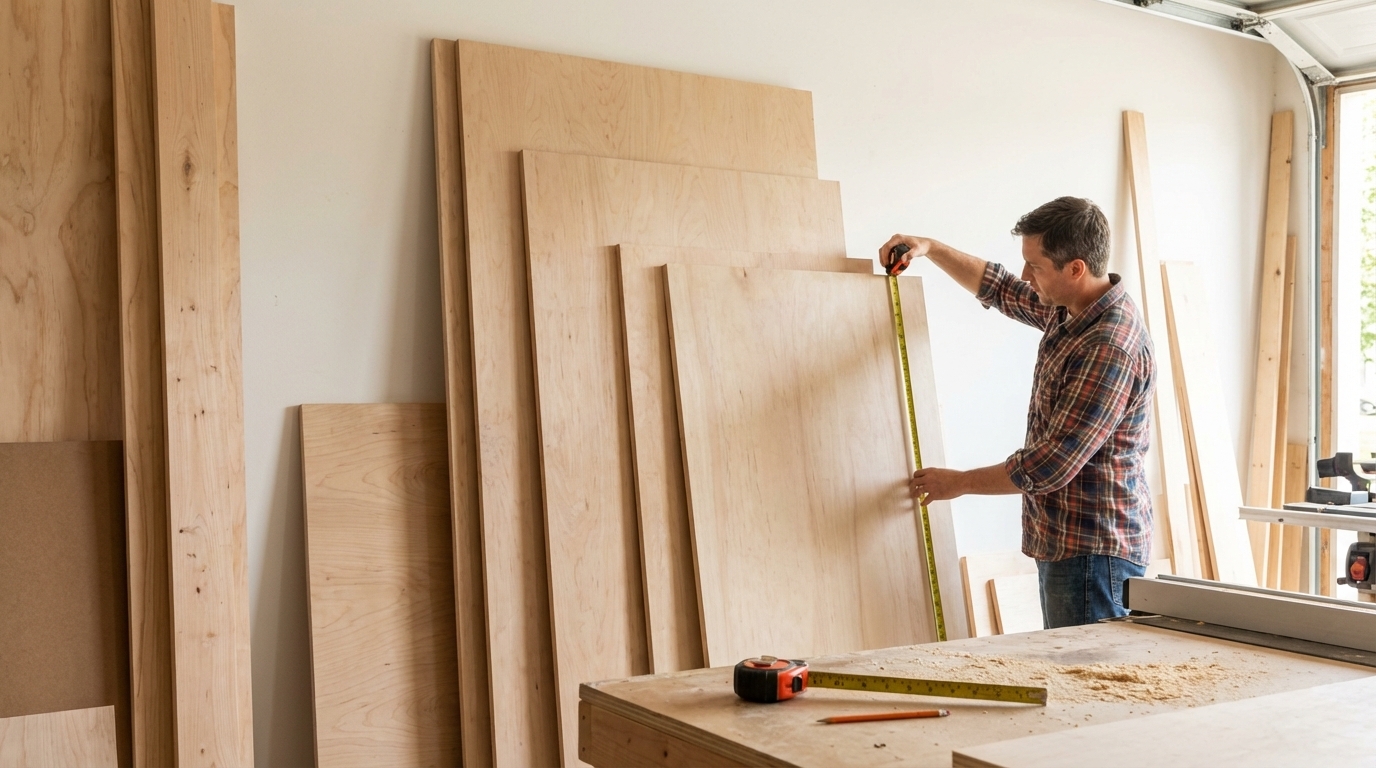
Step 1: Measure Your Ceiling Height and Furniture Dimensions
Start by noting the exact ceiling height at multiple points—Indian floors are rarely perfectly level. For a wardrobe, subtract 50–100 mm from ceiling height for fitting clearance and loft space. If your wardrobe height is 7.5 feet, an 8-foot sheet wastes 6 inches per panel. A 7×4 sheet may yield better extraction in this case.
Step 2: Create a Cutting Layout Before Ordering
Sketch how each furniture component will be extracted from the sheet. For a 6-feet-wide wardrobe with two side panels (each 2 feet deep, 7 feet tall), you need to determine whether panels fit better from an 8×4 or 7×4 sheet. Free online nesting tools or even graph paper can help visualise wastage before you commit to a sheet size.
Step 3: Check Site Access Constraints
Measure your building staircase width, elevator dimensions, and doorway clearances. If any measurement is below 1300 mm, 8×4 sheets will require tilting or manoeuvring that risks edge damage. Factor in whether the carpenter will cut sheets at the dealer's yard or on-site.
Step 4: Verify Local Availability and Price Difference
Not all dealers stock 7×4 or 6×4 sheets in every grade and thickness. A 7×4 BWR sheet may cost more per square foot than 8×4 simply because of lower demand and inventory turnover. Call two or three dealers to confirm availability and compare per-square-foot pricing, not just per-sheet pricing.
Step 5: Account for Finishing and Edge Wastage
Laminate or veneer finishing often requires trimming 10–20 mm from plywood edges for a clean bond. If you're using an 8×4 sheet for components that need exactly 8-foot lengths, you may fall short after trimming. Order one size up or plan for edge-banding solutions.
Trade-offs and Limitations
Each plywood sheet size involves compromises. Understanding these trade-offs helps you avoid costly mistakes.
8×4 Sheet Trade-offs
- Advantage: Maximum coverage, minimum joints, best per-square-foot economy in most markets.
- Limitation: Difficult to transport in compact vehicles, doesn't fit standard elevators, requires large workspace for cutting, and wastes material if ceiling height is below 8 feet.
7×4 Sheet Trade-offs
- Advantage: Better fit for 7.5–8 feet ceilings, easier to handle, fits most staircases.
- Limitation: Lower availability outside South India, slightly higher per-square-foot cost, may require special orders for specific grades.
6×4 Sheet Trade-offs
- Advantage: Ideal for small furniture, easy storage and handling, fits tight site access.
- Limitation: Higher per-square-foot cost, more joints required for large furniture, limited stock availability.
Custom-Cut Sizes
- Advantage: Zero wastage if cut accurately to your dimensions.
- Limitation: Higher cutting charges, longer lead time, risk of incorrect cuts, no flexibility for design changes.
Common Buyer Mistakes and How to Avoid Them
Mistake 1: Ordering Based on Sheet Count Instead of Square Footage
Why it happens: Buyers ask for "10 sheets of plywood" without calculating actual requirement. They assume all sheets are the same size.
What to do instead: Calculate total square footage needed from furniture drawings, add 10–15% for wastage, then convert to sheet count based on specific size (32 sq ft for 8×4, 28 sq ft for 7×4, etc.).
Mistake 2: Ignoring Site Access Until Delivery Day
Why it happens: Focus on material quality and price overshadows logistics planning.
What to do instead: Measure staircase width, elevator dimensions, and hallway turns before ordering. If access is tight, order smaller sheets or arrange for dealer-side cutting.
Mistake 3: Not Verifying Actual Sheet Dimensions
Why it happens: Buyers trust nominal sizes without checking. Calibrated and uncalibrated sheets have different tolerances.
What to do instead: Measure three sheets from the lot with a tape measure. Check both length/width and diagonal for squareness. Accept only sheets within ±5 mm of stated dimensions.
Mistake 4: Choosing Sheet Size Based on Price Alone
Why it happens: A 6×4 sheet appears cheaper than 8×4, but per-square-foot cost is often higher.
What to do instead: Calculate cost per square foot, not per sheet. Factor in wastage from your specific cutting layout.
Mistake 5: Forgetting Edge Trimming Allowance
Why it happens: Buyers assume full sheet dimensions are usable. Factory edges may be rough or slightly damaged.
What to do instead: Deduct 10–20 mm from each edge when planning cuts. For laminate finishing, factor additional trimming for clean bonds.
Mistake 6: Not Accounting for Grain Direction
Why it happens: Plywood face grain runs lengthwise. Buyers ignore this when planning veneer-finish furniture.
What to do instead: Align face grain with the longest dimension of your panel for visual consistency. This may change your extraction efficiency from a given sheet size.
Mistake 7: Storing Large Sheets Improperly
Why it happens: 8×4 sheets are difficult to store flat, so they're often leaned against walls.
What to do instead: Store sheets horizontally on a flat, dry surface with spacer battens. If vertical storage is unavoidable, support sheets at multiple points to prevent warping.
Mistake 8: Ordering Without Confirming Grade Availability in Preferred Size
Why it happens: Buyers assume all grades are available in all sizes. Marine-grade 7×4 may not be stocked locally.
What to do instead: Confirm with dealer that your required grade, thickness, and size combination is available before finalising furniture dimensions.
Failure Modes and Fixes
Failure Mode 1: Warping of Large Panels After Cutting
Symptom: Cut panels develop a bow or twist within days of cutting.
Likely root cause: Internal stress release when large sheets are cut, especially if stored improperly before cutting or if moisture content is uneven.
Prevention: Acclimatise sheets on-site for 48–72 hours before cutting. Store flat and covered. Cut panels slightly oversize, let them stabilise, then trim to final dimension.
If already happening: Light warping can sometimes be corrected by applying laminate or veneer to both faces, creating balanced stress. Severe warping requires replacement.
Failure Mode 2: Joints Opening After Assembly
Symptom: Gaps appear at panel joints in wardrobes or cabinets after a few months.
Likely root cause: Panels cut from different sheets with varying moisture content. Differential shrinkage creates gaps.
Prevention: Source all panels for a single unit from the same sheet wherever possible. Ensure consistent storage conditions across all sheets.
If already happening: Fill gaps with matching wood filler for painted finishes. For laminate, consider edge-banding strips to mask the gap.
Failure Mode 3: Edge Damage During Transport
Symptom: Chipped or crushed edges on delivered sheets, especially 8×4 size.
Likely root cause: Improper handling during loading/unloading, inadequate edge protection, or sheets sliding against each other in transit.
Prevention: Insist on edge protectors during transport. Inspect sheets before accepting delivery. Reject sheets with damaged edges—they compromise joint strength.
If already happening: Trim damaged portions before cutting components. Account for lost usable length in your layout.
Failure Mode 4: Incorrect Size Delivered
Symptom: Sheets delivered are 7×4 when 8×4 was ordered, or thickness is incorrect.
Likely root cause: Order miscommunication, dealer inventory mix-up, or similar-looking stock confusion.
Prevention: Write order details clearly including size in both feet and millimetres. Measure sheets on delivery before signing receipt.
If already happening: Document the discrepancy with photos. Negotiate replacement or price adjustment with dealer immediately—don't accept and hope to manage later.
Failure Mode 5: Wastage Exceeding Budget
Symptom: Actual plywood consumption is 30–40% more than estimated.
Likely root cause: No cutting layout planning, wrong sheet size selection, or carpenter cutting without optimisation.
Prevention: Create detailed cutting layout before ordering. Use nesting software or manual graph-paper planning. Share layout with carpenter to ensure compliance.
If already happening: Salvage offcuts for drawer bottoms, shelf cleats, or backing panels. Discuss with carpenter how remaining work can use scrap efficiently.
Failure Mode 6: Sheets Don't Fit Through Access Points
Symptom: 8×4 sheets cannot enter building due to narrow stairs, small elevator, or tight turns.
Likely root cause: Access not measured before ordering.
Prevention: Always measure access points before finalising sheet size. If doubtful, order 7×4 or arrange for dealer-side cutting.
If already happening: Arrange for sheets to be cut at street level or dealer yard. This adds cost and reduces flexibility but may be the only solution.
Quality Checks You Can Do Without Lab Tests
Before Buying: Visual Inspection at Dealer
- Check dimensional accuracy: Measure length, width, and diagonal of sample sheets. Diagonals should be equal for a square sheet.
- Inspect edges: Look for core gaps, voids, or rough lamination visible at sheet edges. Reject sheets with visible core defects.
- Assess surface flatness: Lay a straight edge across the sheet. Gaps indicate warping or uneven thickness.
- Verify thickness consistency: Measure thickness at corners and centre. Variation should be within 0.5 mm for calibrated sheets.
- Check face veneer quality: Look for patches, cracks, or rough areas on the surface. These affect laminate adhesion.
Questions to Ask the Dealer
- What is the manufacturing date or batch number? (Fresher stock has better moisture balance)
- Is this calibrated or uncalibrated? (Calibrated sheets have tighter thickness tolerance)
- What is the actual dimension tolerance? (Should be ±3 mm for premium, ±10 mm for commercial)
- Can I inspect three sheets from different bundles before finalising?
After Cutting: Workmanship Cues
- Core visibility: Cut edges reveal core quality. Look for uniform layers, tight glue lines, and absence of voids.
- Cutting behaviour: Clean cuts without excessive splintering indicate good internal bonding. Excessive tear-out suggests weak glue or low-density core.
- Screw-holding test: Drive a screw 25 mm from the edge. It should hold firmly without core crumbling.
After Installation: Ongoing Checks
- Joint alignment: Check that panels remain aligned at joints. Shifting indicates inadequate fastening or panel warping.
- Edge sealing verification: Ensure all cut edges are sealed with edge-banding, paint, or laminate. Unsealed edges absorb moisture.
- Hardware mounting integrity: Hinges and handles should remain firm after a month of use. Loosening suggests poor screw-holding in the core.
Decision Framework: Which Sheet Size for Your Situation?
| Your Situation | Recommended Size | What to Verify |
|---|---|---|
| Standard 9-foot ceiling, full-height wardrobe | 8×4 feet | Access width at least 1300 mm, adequate on-site workspace |
| Low ceiling (7.5–8 feet), compact rooms | 7×4 feet | Local dealer stocks this size in your required grade |
| Narrow staircase, no elevator access | 7×4 or 6×4 feet | Measure staircase turning radius, confirm sheet fits |
| Small furniture (study table, side units) | 6×4 feet | Per-square-foot cost comparison with larger sheets |
| Kitchen base units (2-feet depth) | 8×4 feet | Cutting layout yields maximum carcass panels from sheet width |
| Modular factory production | 8×4 calibrated | Thickness tolerance ±0.5 mm, dimensional tolerance ±3 mm |
| Renovation with limited storage space | 6×4 or 7×4 feet | Smaller sheets easier to store between work days |
| Tight budget, maximum economy | 8×4 feet | Calculate wastage; 8×4 usually cheapest per square foot |
Persona-Specific Guidance
For Homeowners: Durability and Practical Tips
- Trust cutting layout calculations over carpenter's verbal estimate. Ask to see the plan before approving sheet purchase.
- Don't store plywood sheets outdoors or in damp garages—even for a few days. Moisture absorption starts at edges within hours.
- Verify delivered sheets match your order before the delivery person leaves. Measure at least one sheet from each bundle.
- If your building has access issues, discuss with the contractor before ordering. Cutting at dealer's yard costs less than managing unusable sheets.
- Keep offcuts labelled and dry—they're useful for future repairs or small projects.
For Carpenters: Cutting and Handling Best Practices
- Always measure actual sheet dimensions before creating cutting layout. Don't assume nominal size is accurate.
- Cut panels from the same sheet for units that will be viewed together—this ensures colour and grain consistency.
- For 8×4 sheets, have a helper support the sheet during cutting to prevent binding and edge damage.
- Mark grain direction on each cut panel if face veneer will be visible. Inconsistent grain orientation looks unprofessional.
- Seal all cut edges immediately with primer or PVA solution to prevent moisture ingress, especially during monsoon.
- For hinge mounting zones, avoid placing hinges within 50 mm of sheet edges where core density is often lower.
For Architects and Interior Designers: Specification Notes
- Specify sheet size in both feet and millimetres to avoid dealer-client miscommunication.
- Include dimensional tolerance requirements in material specifications—±3 mm for length/width, ±0.5 mm for thickness in premium work.
- For wet zones, specify that all cut edges must be sealed regardless of grade. BWR/BWP refers to glue resistance, not surface impermeability.
- When specifying modular systems, align design dimensions with standard sheet sizes to minimise wastage. A 600 mm module width extracts efficiently from 1220 mm sheet width.
- Note access constraints in project documentation. Specifying 8×4 sheets for a building with 1100 mm staircase width creates site problems.
For Modular Furniture Manufacturers: Quality and Efficiency
- Use only calibrated sheets for CNC cutting. Uncalibrated sheet thickness variation causes fitting issues in assembly.
- Maintain incoming inspection log with sheet dimensions, thickness measurements at four corners, and batch numbers.
- Optimise panel nesting to achieve 85%+ material utilisation from 8×4 sheets. Track wastage percentage per batch.
- Reject sheets with dimensional variance exceeding ±5 mm—such sheets cause downstream problems in edge-banding and assembly.
- Store sheets flat with support battens every 600 mm to prevent sagging and warping in the production queue.
- Standardise internal designs around efficient extraction from 8×4 or 7×4 sheets. Odd dimensions increase wastage and cost.
How Does Sheet Size Affect Plywood Price?
Plywood pricing in India is quoted either per sheet or per square foot, and the sheet size significantly impacts your actual cost. Larger sheets generally offer better per-square-foot economy because manufacturing, handling, and logistics costs are distributed over more area. However, this advantage disappears if wastage from your cutting pattern exceeds 15%.
Typical price relationship (indicative, varies by market and grade):
- 8×4 sheet: Base per-square-foot rate
- 7×4 sheet: Often 5–10% higher per square foot due to lower production volume
- 6×4 sheet: May be 10–15% higher per square foot, sometimes cut from 8×4 with cutting charge added
For accurate comparison, always calculate: (Sheet price ÷ Usable square feet after your cutting layout) = True cost per usable square foot.
Cost Drivers Beyond Sheet Size
- Grade: MR costs less than BWR, which costs less than Marine/BWP
- Thickness: Price increases with thickness—19 mm costs more than 12 mm
- Calibration: Calibrated sheets cost 10–20% more than uncalibrated
- Core species: Gurjan/hardwood core costs more than poplar/softwood core
- Face veneer: Better face veneer quality adds to price
- Brand and certification: ISI-marked sheets typically cost more than unbranded
- Location: Prices vary 10–25% between metros and smaller towns
Can You Get Custom-Cut Plywood Sheets?
Many plywood dealers in India offer cutting services, allowing you to receive sheets pre-cut to your specified dimensions. This option has both advantages and risks that you should evaluate carefully.
Advantages of Dealer-Side Cutting
- Easier transport and site access—cut panels fit through narrow spaces
- Reduced on-site workspace requirement
- Professional panel-saw cuts may be cleaner than circular-saw cuts on site
- Wastage calculation is finalised before delivery
Risks of Pre-Cutting
- No flexibility for design changes or site adjustments
- If dimensions are specified incorrectly, panels cannot be recut larger
- Cutting accuracy depends on dealer's equipment and skill
- Panel damage during individual transport (more pieces = more handling)
- Difficult to verify original sheet quality after cutting
When Pre-Cutting Makes Sense
Pre-cutting works well for repetitive modular work with fixed dimensions, when site access is severely constrained, or when the carpenter lacks quality cutting equipment. For custom one-off furniture with potential design refinements, on-site cutting provides more flexibility.
What Is the Best Plywood Size for Kitchen Cabinets?
Kitchen cabinets typically use 8×4 sheets for optimal material extraction. Standard base-unit depth of 550–600 mm extracts two carcass sides from the 1220 mm width. Standard upper-cabinet height of 600–750 mm extracts efficiently from the 2440 mm length with minimal wastage.
For kitchens in compact apartments with access constraints, 7×4 sheets work well for upper cabinets while 8×4 may still be necessary for tall-unit panels. Calculate your cutting layout for both sizes and compare total wastage before deciding.
Key considerations for kitchen plywood sizing:
- Base units (900 mm height): Three carcass sides from one 8×4 sheet length, two from width
- Wall units (600 mm height): Four carcass sides from one 8×4 sheet length
- Tall units (2100+ mm height): May require full 8-foot length or panel joining
- Shutters: Multiple shutters nest from the same sheet; grain direction alignment matters for veneer finishes
How Do Plywood Sheet Sizes Relate to Indian Standard Specifications?
Indian Standards (IS) specifications primarily address plywood grades, bonding quality, and physical properties rather than mandating specific sheet sizes. However, IS codes reference standard dimensions for testing and quality control purposes.
Key points from IS specifications relevant to sizing:
- IS 303 (general-purpose plywood) and IS 710 (marine plywood) test samples are cut from standard-sized sheets
- Dimensional tolerance requirements apply regardless of sheet size—typically ±1% of stated length/width
- Thickness tolerance is specified separately and is stricter for calibrated grades
- Squareness requirements apply—diagonal measurements should match within specified tolerance
When purchasing ISI-marked plywood, you can expect stated dimensions to be within manufacturing tolerance. For unbranded sheets, always verify dimensions yourself before accepting delivery.
Why Does 7×4 Plywood Size Exist When 8×4 Is Standard?
The 7×4 feet sheet size originated to match ceiling heights common in certain regions and building types. In many South Indian cities, traditional construction featured 7.5–8 feet ceilings, making 7×4 sheets more efficient for full-height furniture. This size also fits better in older buildings with compact staircases.
Today, 7×4 remains popular in South India and specific markets where regional manufacturers produce this size locally. It's not merely a cut-down version of 8×4—dedicated 7×4 production means pricing can be competitive in areas with consistent demand.
Practical decision: If your ceiling height is 8 feet or below, calculate extraction efficiency from both 8×4 and 7×4 sheets. The 7×4 option may reduce wastage enough to offset any per-square-foot premium.
FAQs
What is the standard plywood sheet size in India?
The most widely available standard plywood sheet size in India is 8×4 feet (2440×1220 mm), offering 32 square feet of coverage. This size suits most furniture applications including wardrobes, kitchen cabinets, and partitions because it aligns with typical Indian ceiling heights and standard furniture dimensions. Major manufacturers calibrate production for this size, making it the most cost-efficient option per square foot in most markets. However, 7×4 feet sheets are also considered standard in South India and are readily available in those regions.
How do I calculate how many plywood sheets I need for my project?
Calculate plywood requirement by first determining the total surface area of all panels in your furniture design—add up the square footage of carcass sides, shelves, backs, and shutters. Then add 10–15% for cutting wastage and edge trimming. Divide this total by the area of your chosen sheet size (32 sq ft for 8×4, 28 sq ft for 7×4, 24 sq ft for 6×4). Round up to the nearest whole number since you cannot buy partial sheets. Creating a detailed cutting layout before ordering helps refine this estimate and reduces unexpected shortfall.
Is 6×4 plywood more expensive than 8×4?
On a per-square-foot basis, 6×4 plywood is typically 10–15% more expensive than 8×4 in most Indian markets. This price difference exists because 6×4 sheets have lower production volume, higher handling costs relative to area, and are sometimes cut from 8×4 sheets with the cutting charge added. However, if your project dimensions result in significant wastage from 8×4 sheets while 6×4 sheets yield better extraction, the effective cost may favour the smaller size. Always calculate total project cost including wastage, not just sheet price.
Can plywood be cut to custom sizes at the dealer?
Yes, most established plywood dealers in India offer cutting services using panel saws. You can provide specific dimensions for panels, and they will cut sheets before delivery. This service typically incurs a per-cut or per-sheet cutting charge. Dealer-side cutting helps when site access is restricted or workspace is limited. However, ensure your dimensions are finalised before requesting cuts since mistakes cannot be undone. Also verify cutting accuracy by checking measurements on a few sample pieces before accepting the full delivery.
What plywood size works best for low-ceiling apartments?
For apartments with ceiling heights of 8 feet or below, 7×4 feet sheets often provide better material utilisation than 8×4 sheets. A wardrobe in an 8-foot ceiling room typically stands 7–7.5 feet tall to allow for loft space and fitting clearance. From an 8-foot sheet, 6–12 inches becomes wastage per full-height panel. A 7×4 sheet reduces this wastage while also being easier to transport through compact staircases common in older buildings. Calculate extraction efficiency for your specific furniture heights before choosing.
Does sheet size affect plywood quality?
Sheet size itself does not directly affect plywood quality—the same grade and brand in 8×4, 7×4, or 6×4 should have identical core construction, glue quality, and face veneer standards. However, smaller sheets may come from edge portions of larger production runs, occasionally showing slightly different characteristics. More significantly, quality variations exist between batches regardless of size. Always inspect sheets for flatness, edge integrity, and core quality regardless of size. Purchase all sheets for a project from the same batch when possible.
Why do some regions prefer 7×4 plywood over 8×4?
Regional preference for 7×4 plywood in South India stems from historical construction practices featuring lower ceiling heights, local manufacturing traditions, and practical transport considerations. Many South Indian cities developed with 7.5–8 feet ceilings as standard, making 7×4 sheets more efficient for furniture. Local manufacturers respond to this demand with dedicated 7×4 production, ensuring competitive pricing and availability. Additionally, narrow streets and older buildings in dense urban areas make smaller sheets easier to transport and handle.
How should I store plywood sheets before use?
Store plywood sheets horizontally on a flat, dry, and level surface with support battens placed every 600 mm to prevent sagging. Keep sheets away from direct ground contact using wooden blocks or pallets to avoid moisture absorption from concrete floors. Cover sheets with plastic sheeting to protect from dust and humidity, but allow air circulation to prevent condensation. If horizontal storage is impossible, lean sheets at a near-vertical angle with support at multiple points. Avoid storing outdoors or in damp areas, even temporarily. Use sheets within 2–4 weeks of delivery for best results.
Disclaimer: This content is provided for general informational purposes based on industry practices and publicly available information. Product specifications, standards, prices, and availability may vary by manufacturer, region, and time. Readers should independently verify details with manufacturers, dealers, or qualified professionals before making purchase or construction decisions.Want Plywood Suggestions?
Share a few details and a Duro BOIL specialist will suggest suitable brands and connect you to responsive dealers.