Veneer Sheets Price: Teak, Oak, Walnut & Popular Veneer Rate Ranges (India 2026)
Veneer sheets price ranges by popular wood types, thickness and finish—plus how to compare veneer quotes and avoid low-grade veneer batches.
Quick Decision Summary
Best answer in one line: Expect veneer sheets in India to range from ₹45–₹350+ per square foot depending on species, thickness, and finish quality.
If you're in a hurry: Teak veneer typically commands the highest prices (₹120–₹350/sq ft for quality grades), followed by walnut (₹90–₹280/sq ft), oak (₹75–₹220/sq ft), and popular commercial species like sapele or ash (₹50–₹150/sq ft). Prices fluctuate based on veneer thickness (0.25mm to 1mm+), backing type (paper-backed vs fleece-backed), grain pattern (crown cut vs quarter cut), and your city's logistics costs. Always request physical samples before bulk orders—photos rarely capture grain consistency or color accuracy that matters on large furniture surfaces.
- Choose natural veneer if: You want genuine wood character, are finishing furniture/doors/panels where grain beauty matters, and have skilled application resources
- Avoid natural veneer if: Application surfaces face direct water exposure, you need perfect uniformity across dozens of panels, or installation skill level is uncertain
What Veneer Sheets Actually Are (And Why Prices Vary So Much)
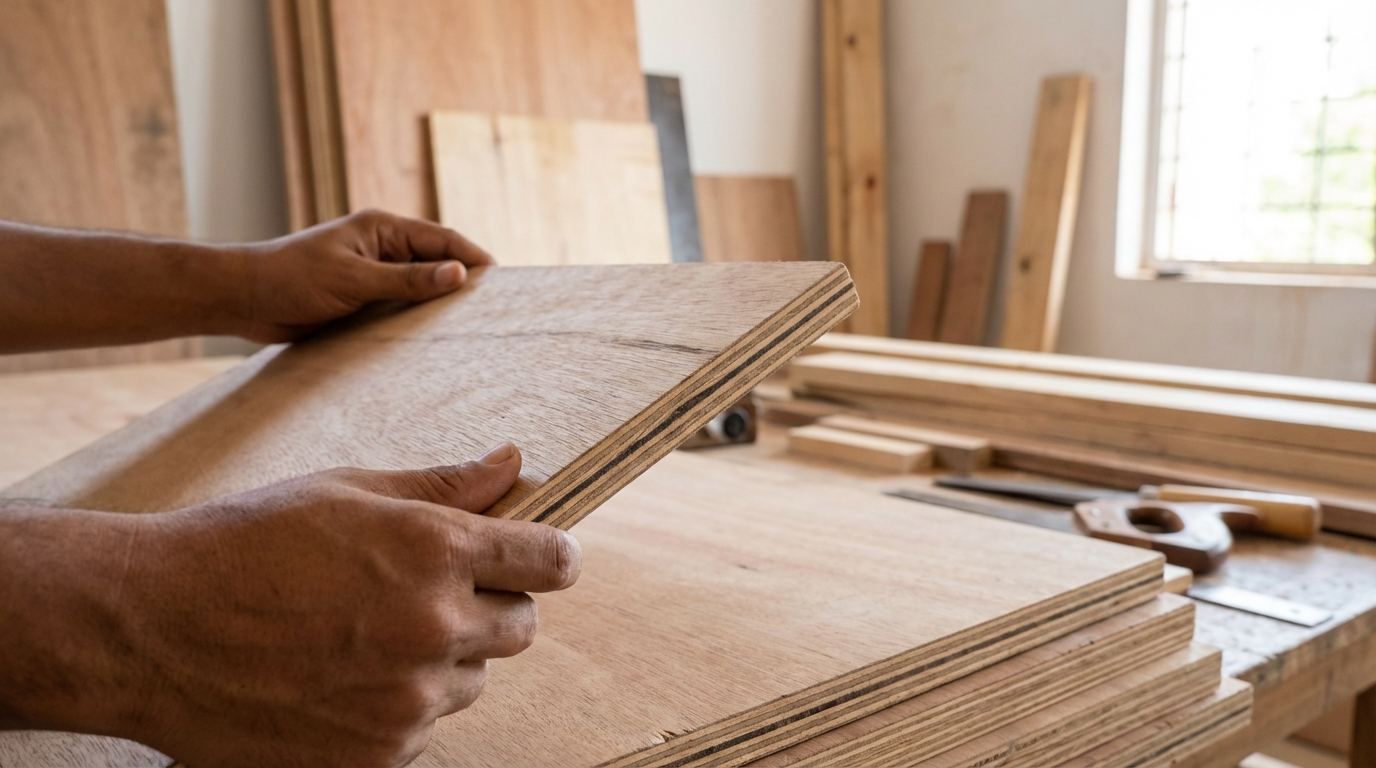
Veneer sheets are thin slices of real wood—typically 0.25mm to 1mm thick—peeled or sliced from logs and applied over substrates like plywood, MDF, or particle board. Unlike laminates (which are printed papers with resin), veneer retains actual wood grain, texture, and color variation. This authenticity is precisely why pricing spans such a wide range: you're buying a natural material where quality depends on the specific log, cutting method, and finishing process.
Where People Get Confused About Veneer Pricing
- Confusing veneer with laminate: Laminate sheets use printed decor paper; veneer is real wood. Laminate prices are more predictable; veneer prices depend on wood species rarity and log quality
- Assuming thickness equals durability: Thicker veneer (0.5mm+) allows sanding and refinishing but costs more; thin veneer (0.25mm) works fine for low-wear surfaces if properly finished
- Ignoring backing type in quotes: Paper-backed veneer is cheaper but harder to apply; fleece-backed veneer costs more but handles curves and gluing better
- Comparing different cut types at same price: Quarter-cut teak (straight grain) typically costs 20–40% more than crown-cut (cathedral pattern) from the same species
- Not accounting for wastage: Veneer requires 15–25% extra for matching, trimming, and defect avoidance—quotes often don't include this buffer
Price Range and Cost Drivers for Veneer Sheets in India
Veneer pricing in India varies significantly based on species origin, grade, and supply chain. Domestic species like Indian teak or rosewood alternatives cost less than imported European oak or American walnut. Below are indicative ranges for 2026—always confirm with local suppliers as international freight and currency fluctuations affect imported veneer costs substantially.
Teak Veneer Price Ranges
| Teak Grade/Type | Thickness Range | Indicative Price (₹/sq ft) |
|---|---|---|
| Indian plantation teak | 0.25–0.5mm | ₹80–₹180 |
| Burma teak (imported) | 0.3–0.6mm | ₹150–₹350 |
| Teak quarter-cut premium | 0.4–0.6mm | ₹180–₹320 |
| Reconstituted teak-look | 0.25–0.5mm | ₹45–₹90 |
Oak Veneer Price Ranges
| Oak Type | Thickness Range | Indicative Price (₹/sq ft) |
|---|---|---|
| European white oak | 0.5–0.6mm | ₹95–₹220 |
| American red oak | 0.5mm | ₹75–₹160 |
| Oak quarter-cut (rift) | 0.5–0.6mm | ₹130–₹250 |
| Smoked/fumed oak | 0.5mm | ₹140–₹280 |
Walnut Veneer Price Ranges
| Walnut Type | Thickness Range | Indicative Price (₹/sq ft) |
|---|---|---|
| American black walnut | 0.5–0.6mm | ₹120–₹280 |
| European walnut | 0.5mm | ₹100–₹220 |
| Walnut burl/figured | 0.4–0.5mm | ₹200–₹400+ |
| Walnut crown-cut standard | 0.5mm | ₹90–₹180 |
Popular Commercial Species Price Ranges
| Species | Typical Use | Indicative Price (₹/sq ft) |
|---|---|---|
| Sapele | Mahogany alternative for doors/furniture | ₹55–₹130 |
| Ash | Light-colored furniture, Scandinavian style | ₹60–₹140 |
| Maple | Contemporary interiors, light finish | ₹65–₹150 |
| Cherry | Warm-toned furniture, ages beautifully | ₹80–₹170 |
| Wenge | Dark dramatic furniture/panels | ₹90–₹200 |
What Drives Veneer Prices Up or Down?
- Species rarity: Burma teak, figured walnut, and exotic burls command premiums due to limited availability
- Cut method: Quarter-cut and rift-cut veneers waste more log material, increasing cost 20–40% over rotary or plain slicing
- Thickness: Each 0.1mm increase adds roughly 10–15% to cost; thicker veneers also reduce sheet yield per log
- Backing: Fleece-backed typically costs ₹8–₹20/sq ft more than paper-backed but improves application success rate
- Finish/treatment: Pre-sanded, dyed, or UV-finished veneers add ₹15–₹50/sq ft processing cost
- City logistics: Delhi, Mumbai, and Bengaluru have competitive pricing; tier-2/3 cities may see 10–20% markup due to transport
- Import duties and forex: Imported European/American veneers fluctuate with rupee strength and shipping costs
How to Request a Proper Veneer Quote
When asking suppliers for pricing, specify these details to get comparable quotes:
- Species name (common and botanical if possible)
- Cut type: rotary, crown/flat, quarter, rift
- Thickness required in mm
- Backing: raw, paper-backed, or fleece-backed
- Sheet size or bundle size
- Grade: A, B, or C (defect tolerance)
- Quantity needed (bundles often priced differently than loose sheets)
- Delivery location
Sample Budget Calculation: Wardrobe Project
Scenario: 120 sq ft visible surface area for wardrobe shutters using American walnut veneer on MDF substrate.
- Veneer area with 20% wastage buffer: 144 sq ft
- Walnut veneer at ₹150/sq ft (mid-grade): ₹21,600
- Fleece-backing upgrade (+₹12/sq ft): ₹1,728
- Application adhesive and edge veneer: ₹2,000–₹3,500
- Total veneer material cost: ₹25,000–₹27,000 approximately
This excludes substrate cost, labor, and finishing. Actual project quotes should itemize each component separately.
India-Specific Reality Check for Veneer Selection
Does Humidity Affect Veneer More Than Laminate?
Yes, veneer responds to moisture more actively than synthetic laminates. In coastal cities like Mumbai, Chennai, or Kochi, relative humidity often exceeds 75% for months. This causes veneer to expand slightly, and if the substrate beneath also moves differently, you risk edge lifting or micro-cracks in finish. The solution isn't avoiding veneer—it's choosing appropriate substrates (moisture-resistant MDF or BWR plywood), ensuring proper edge sealing, and applying adequate finish coats (minimum 2–3 coats of PU or lacquer).
Storage Before Installation Matters Enormously
Veneer sheets stored in non-climate-controlled warehouses or delivered during monsoon may arrive with elevated moisture content. Installing immediately can cause problems once the veneer acclimates to air-conditioned interiors (dries out and shrinks). Best practice: store veneer sheets flat in the installation environment for 48–72 hours before application. This is especially critical for thick veneers (0.5mm+) and during monsoon months.
Workmanship Quality Varies Dramatically
Veneer application requires skill—proper adhesive spreading, controlled pressure during bonding, precise trimming, and careful sanding before finishing. Inexperienced carpenters often apply too much or too little adhesive, leave air bubbles, or sand through thin veneers. Before approving a carpenter or fabricator for veneer work, ask to see completed samples or previous projects. The material cost means nothing if application fails.
How Does Veneer Thickness Affect Price and Performance?
Thickness is one of the most significant price determinants, yet many buyers don't understand its practical implications. Thinner veneers (0.25mm) are more affordable and work well for vertical surfaces with minimal wear—but they cannot be sanded if damaged or if finish wears through. Thicker veneers (0.5mm–1mm) cost substantially more but allow light sanding and refinishing once or twice during the furniture's lifetime. For high-use surfaces like dining tables or kitchen cabinet fronts, invest in 0.5mm+ thickness.
When 0.25mm Thin Veneer Makes Sense
- Decorative wall panels in low-traffic areas
- Back panels of furniture not visible during daily use
- Ceiling applications
- Budget projects where refinishing isn't planned
When 0.5mm+ Thickness Is Worth the Premium
- Table tops, desk surfaces, and dining furniture
- Door shutters that receive daily handling
- Furniture intended to last 15+ years
- Surfaces where minor scratches might need sanding later
Trade-offs and Limitations of Natural Veneer
Veneer offers genuine wood beauty, but understanding its limitations prevents disappointment:
- Color variation is inherent: Unlike laminates, veneer from different logs or even different parts of the same log will vary. This is a feature, not a defect—but requires careful sheet selection and matching for large projects
- Water sensitivity: Direct water contact causes swelling, staining, and potential delamination. Veneer is unsuitable for areas with standing water unless heavily sealed
- UV fading: Most natural veneers darken or change tone with sunlight exposure over years. This is natural wood behavior, not a quality issue
- Repair difficulty: Unlike solid wood, damaged veneer often requires full panel replacement rather than spot repair
- Application skill dependency: Poor application ruins expensive veneer; the material's quality alone doesn't guarantee results
- Edge vulnerability: Veneer edges are fragile and require careful edging or return details to prevent lifting
Common Buyer Mistakes and How to Avoid Them
Mistake 1: Ordering Without Physical Samples
Why it happens: Online catalogs show idealized images; buyers assume delivered veneer will match exactly.
What to do instead: Request actual samples from the specific batch you'll purchase. View samples in daylight and under artificial light similar to the installation space.
Mistake 2: Ignoring Grain Direction Planning
Why it happens: Buyers order sufficient square footage but don't plan how grain will flow across adjacent panels.
What to do instead: Work with your carpenter to create a cutting diagram showing grain continuity. Order sequential leaves from the same flitch for matching.
Mistake 3: Choosing Species Based Only on Color
Why it happens: Many species can be stained to similar colors, so buyers pick cheaper options.
What to do instead: Consider grain pattern, hardness, and stability. Teak's interlocked grain differs visually from walnut's flowing patterns—staining won't replicate this.
Mistake 4: Not Specifying Backing Type
Why it happens: Buyers focus on species and price, assuming backing is standardized.
What to do instead: Explicitly specify backing (raw, paper, or fleece) in orders. Confirm your carpenter's preference and skill level with each type.
Mistake 5: Underestimating Wastage Requirements
Why it happens: Calculations use exact surface area without accounting for trimming, matching, and defect avoidance.
What to do instead: Add 15–25% wastage factor depending on pattern matching complexity. Complex designs with book-matching need higher buffers.
Mistake 6: Skipping Finish Compatibility Check
Why it happens: Buyers assume any finish works on any veneer.
What to do instead: Test finish on sample piece first. Some open-pore species (oak, ash) require grain filling before smooth finishes; oily species (teak) may reject water-based finishes.
Mistake 7: Comparing Quotes Without Specification Alignment
Why it happens: Quotes from different suppliers use different specs, but buyers compare only bottom-line prices.
What to do instead: Create standardized specification sheet and ask all suppliers to quote against identical requirements.
Mistake 8: Storing Veneer Improperly Before Application
Why it happens: Veneer arrives and sits in humid storage or direct sunlight before installation.
What to do instead: Store flat, covered, away from direct sunlight, in conditions similar to final installation environment for minimum 48 hours.
Failure Modes and Fixes
Failure: Veneer Edge Lifting After Installation
Symptom: Edges curl away from substrate within weeks or months of installation.
Likely root cause: Inadequate adhesive at edges, insufficient press time, or humidity differential between veneer and substrate.
Prevention: Ensure edge areas receive proper adhesive coverage and pressure. Use contact cement or PVA appropriate for veneer thickness.
If already happening: Carefully lift edge, clean old adhesive, reapply fresh adhesive, clamp with wax paper protection, and seal edge after cure.
Failure: Bubbles or Blisters Under Veneer Surface
Symptom: Raised areas visible when light reflects across surface at angles.
Likely root cause: Air trapped during application, inadequate adhesive spread, or insufficient pressing pressure.
Prevention: Use proper roller technique from center outward; ensure complete adhesive coverage without excess.
If already happening: For small bubbles, carefully slit with sharp blade along grain, inject adhesive, press flat, and sand/finish over repair.
Failure: Veneer Cracking Along Grain Lines
Symptom: Fine cracks parallel to grain direction, often appearing after seasonal humidity changes.
Likely root cause: Substrate movement exceeding veneer flexibility, or finish too rigid for wood movement.
Prevention: Use stable substrates (MDF over particleboard for stability); apply flexible finish systems.
If already happening: Sand area lightly, fill hairline cracks with matching wood filler, refinish entire panel for uniformity.
Failure: Color Variation Between Adjacent Panels
Symptom: Visible color mismatch where panels meet, despite using same species.
Likely root cause: Sheets from different flitches/logs mixed during installation.
Prevention: Order sequential sheets from same flitch; mark sheet sequence and maintain during installation.
If already happening: Limited options—can attempt uniform stain/toner coat, but results vary. Prevention is critical.
Failure: Finish Peeling or Not Adhering
Symptom: Clear coat or lacquer flakes off or shows poor adhesion.
Likely root cause: Oily species not properly cleaned, insufficient sanding between coats, or incompatible finish system.
Prevention: Wipe oily veneers with appropriate solvent before finishing; sand between coats with 320+ grit; use compatible primer/finish combinations.
If already happening: Strip failed finish completely, clean surface, and reapply with correct preparation.
Failure: Sun Bleaching or Uneven Fading
Symptom: Areas exposed to sunlight become noticeably lighter or different in tone from shaded areas.
Likely root cause: UV exposure without adequate UV-resistant finish, or objects blocking light on portions of surface.
Prevention: Apply UV-inhibiting clear coats; use window treatments in high-sun areas; rotate objects on surfaces periodically.
If already happening: Even out color by exposing entire surface to similar light conditions; consider refinishing with tinted finish to mask differences.
Quality Checks You Can Do Without Lab Tests
Before Buying: Inspection at Supplier
- Flex test: Gently bend veneer sheet—quality veneer flexes without immediate cracking; brittle veneer indicates age or poor storage
- Grain consistency: Check that sheets labeled as "sequential" actually show visual continuation of grain pattern
- Thickness uniformity: Use calipers at multiple points; variation beyond ±0.05mm indicates quality control issues
- Color batch consistency: Place sheets side by side in natural light; significant color variation within a batch suggests mixed sourcing
- Back surface: Check backing adhesion; paper or fleece should be fully bonded without bubbles or gaps
- Storage conditions: Ask how veneer is stored—controlled humidity environment indicates professional supplier
After Cutting: Workmanship Indicators
- Cut edges: Clean cuts without splintering indicate sharp tools and proper technique
- Joint seams: Where veneer sheets meet, seams should be nearly invisible with proper book-matching
- Adhesive squeeze-out: Minimal visible adhesive at edges indicates proper application quantity
- Surface flatness: Run straight edge across surface; no bumps, waves, or depressions should be visible
After Installation: Long-term Quality Signs
- Edge sealing: All veneer edges should be sealed or edged—no raw veneer edges exposed
- Finish uniformity: Consistent sheen across surface without blotchy areas or witness lines
- Hardware zones: Areas around handles and hinges should show no cracking or lifting
- Cleaning response: Quality finish cleans easily with damp cloth without water marks
Decision Framework: Which Veneer Type for Which Situation
| Condition/Requirement | Recommended Veneer Choice | What to Verify |
|---|---|---|
| High humidity/coastal area | Teak or sapele with oil finish | Substrate is BWR grade; edges fully sealed |
| Heavy daily use (dining table) | 0.5mm+ thickness; hard species (oak, maple) | Minimum 3 coats durable PU finish |
| Tight budget, large area | Reconstituted veneer or commercial species (ash, sapele) | Acceptable grain pattern; proper backing |
| Premium furniture, long life | Natural teak or walnut, 0.5mm+, fleece-backed | Sequential matching; skilled applicator |
| Curved surfaces | Thin veneer (0.25mm) with fleece backing | Applicator experienced with curves |
| UV-exposed areas (near windows) | Oak or maple (fade gracefully) | UV-resistant finish specified |
| Dark dramatic look | Walnut or wenge | Grain filler applied before finish |
| Light Scandinavian aesthetic | Ash, maple, or bleached oak | White-stain compatibility tested on sample |
Tips for Homeowners: Durability and Care
- Do: Wipe spills immediately—don't let liquids sit on veneer surfaces
- Do: Use coasters and placemats on veneer tables
- Do: Dust with soft, slightly damp microfiber cloth
- Do: Use felt pads under decorative objects to prevent scratching
- Don't: Use abrasive cleaners or rough scrubbing pads
- Don't: Place veneer furniture in direct constant sunlight
- Don't: Apply excessive water when cleaning—damp, not wet
- Don't: Slide heavy objects across veneer surfaces
- Maintenance note: Annual application of furniture polish (non-silicone) helps maintain finish luster
Tips for Carpenters: Application and Fabrication
- Cutting: Use sharp, fine-tooth blades; support veneer fully to prevent chipping at cut edges
- Adhesive selection: Contact cement for quick work; PVA for press applications; consult adhesive technical sheets for open time
- Edge preparation: Slight chamfer on substrate edges prevents veneer cracking at corners
- Hinge areas: Avoid placing veneer seams near hinge screw zones—stress concentration causes cracking
- Pressing: Use cauls and even pressure distribution; center-out rolling removes air
- Grain direction: Align grain direction with longest dimension for best visual impact
- Sanding sequence: Start with 180 grit, finish with 320; sand along grain only
- Finishing: Seal veneer edges before panel assembly to prevent moisture entry
Tips for Architects and Designers: Specification and Detailing
- Specification clarity: Include species, cut type, thickness, backing, and grade in all specifications
- Sample approval: Require physical sample approval before production begins; photograph approved sample for reference
- Book-matching requirements: Specify matching type (book, slip, random) and acceptable deviation tolerance
- Wet zone caution: Veneer is not recommended for bathroom vanity tops or kitchen sink surrounds without aggressive sealing protocols
- Finish systems: Specify complete finish system including sealer, coats, and sheen level
- Edge details: Design edge returns or specify solid wood lipping to protect veneer edges
- Lighting considerations: Veneer shows grain differently under various light angles—review samples under project-specific lighting
Tips for OEM and Modular Furniture Makers: Production QC
- Incoming inspection: Check every bundle for thickness consistency, backing integrity, and color matching before accepting delivery
- Batch tracking: Maintain lot numbers through production; enables tracing if field failures occur
- Environment control: Store veneer in climate-controlled space; condition 48+ hours before application
- Adhesive consistency: Standardize adhesive type, spread rate, and open time across production batches
- Press calibration: Regular calibration of press pressure and temperature ensures consistent bonding
- QC checkpoints: Inspect after pressing (bubbles), after sanding (sand-through), after first finish coat (adhesion), after final coat (uniformity)
- Warranty documentation: Document veneer source, substrate grade, adhesive type, and finish system for each production batch
- Common return causes: Edge lifting (adhesive/pressure issue), color mismatch (batch mixing), finish failure (preparation issue)—address root causes in process, not just inspection
Is Reconstituted Veneer Worth Considering?
Reconstituted (also called recon or engineered) veneer uses real wood but reconstructs it to achieve consistent grain patterns and colors. It's created by dyeing and reassembling wood fibers to mimic expensive species like teak, walnut, or ebony. Prices are typically 40–60% lower than natural equivalents. For projects requiring perfect uniformity across large areas (hotel lobbies, commercial offices), reconstituted veneer offers consistency impossible with natural veneer. However, purists can often distinguish it from natural veneer upon close inspection—the grain pattern, while beautiful, lacks the randomness of nature. It's an excellent choice when budget matters and visual consistency trumps authenticity.
How Do I Compare Veneer Quotes Fairly?
Veneer quotes often seem incomparable because suppliers use different specifications. Create a standardized comparison by requesting all suppliers quote against identical requirements: same species, same thickness, same backing type, same cut, same sheet size, same quantity. Include delivery to your location. Then compare not just price per square foot, but also supplier reliability (ask for references), return/defect policies, and minimum order requirements. A slightly higher price from a supplier with good quality control and responsive service often proves cheaper than fighting defect issues with the lowest bidder.
What's the Difference Between Crown Cut and Quarter Cut Veneer?
Crown cut (also called flat cut or plain sliced) produces the classic "cathedral" grain pattern—arches and flowing shapes that many associate with wood character. Quarter cut slices the log perpendicular to growth rings, producing straighter, more uniform grain lines. Quarter cut typically costs more because it yields fewer usable sheets per log. The choice depends on aesthetic preference: crown cut for dramatic, traditional looks; quarter cut for contemporary, linear designs. Some species like oak show distinct medullary rays in quarter cut (known as "ray flake" or "fleck"), prized in certain design styles.
Can I Apply Veneer Over Old Laminate Surfaces?
Technically possible but rarely recommended. Success requires the existing laminate to be perfectly flat, well-adhered, and thoroughly abraded (sanded) to create mechanical bonding surface. Even then, adhesion is compromised compared to bonding directly to wood or MDF. For valuable veneer investment, better practice is removing old laminate and applying veneer to fresh substrate. If laminate removal isn't feasible, consider using fleece-backed veneer with contact cement and accepting that longevity may be reduced. Test on a sample piece before committing to full project.
Why Does the Same Species Veneer Look Different from Two Suppliers?
Natural veneer varies because trees vary. A walnut tree from different growing conditions (climate, soil, age) produces different grain patterns and colors. Additionally, cutting method affects appearance, and different suppliers may source from different regions. This isn't a quality issue—it's nature. The practical solution: always request samples from the actual batch you'll receive, not generic catalog samples. For projects requiring multiple bundles, order from a single flitch (sequential leaves from the same log section) to ensure consistency.
FAQs
What is the average price per square foot for teak veneer in India?
Indian plantation teak veneer typically ranges from ₹80–₹180 per square foot for standard thicknesses (0.25–0.5mm). Imported Burma teak commands premium prices of ₹150–₹350 per square foot due to superior grain quality and natural oil content. Quarter-cut teak with straight grain falls at the higher end of these ranges. Reconstituted teak-look veneer offers a budget alternative at ₹45–₹90 per square foot but lacks natural teak's authenticity. Always factor in 15–20% wastage when calculating total project cost, and confirm current pricing with suppliers as rates fluctuate with international markets.
Is veneer better than laminate for furniture durability?
Neither is universally "better"—they serve different purposes. High-pressure laminate (HPL) offers superior scratch resistance, moisture resistance, and consistency, making it excellent for high-wear commercial applications. Veneer provides authentic wood beauty that laminate cannot replicate, and high-quality veneer furniture with proper finishing can last decades with appropriate care. For environments with heavy daily use and cleaning (kitchens, hospitals), laminate often performs better. For premium furniture where wood character matters (living rooms, executive offices), veneer delivers aesthetic value that justifies its higher maintenance requirements.
How much extra veneer should I order for a project?
Standard recommendation is 15–20% additional veneer beyond calculated surface area. Complex projects with book-matching, diagonal patterns, or curved surfaces may require 25–30% extra. This buffer accounts for trimming waste, defect avoidance, and matching requirements. When ordering from specific flitches for color consistency, err toward higher wastage estimates—running short mid-project and ordering from a different flitch creates visible color mismatches. Unused quality veneer can be stored flat for future repairs or small projects.
Can veneer sheets be applied on MDF and plywood both?
Yes, veneer bonds successfully to both substrates with appropriate adhesives and technique. MDF provides a smoother, more uniform surface that's often preferred for high-quality veneer work—no grain telegraphing through thin veneers. Plywood offers better screw-holding and structural strength for applications like doors and cabinet carcasses. For moisture-prone areas, use BWR or marine-grade plywood rather than MDF, which swells significantly when exposed to water. The choice depends on application requirements: MDF for appearance-critical flat panels, plywood for structural applications or humid environments.
How do I prevent veneer from cracking after application?
Veneer cracking typically results from substrate movement, excessive brittleness, or finish inflexibility. Prevention starts with stable substrates—MDF moves less than particleboard; cross-banded plywood resists dimensional change. Allow veneer to acclimatize to installation environment for 48–72 hours before application. Use adhesives rated for veneer work with appropriate flexibility. Apply finish systems designed for wood movement—multiple thin coats of flexible PU rather than thick rigid lacquer. In very dry climates, maintain some humidity in living spaces during winter months to prevent extreme wood shrinkage.
What veneer species works best for kitchen cabinets?
For kitchen environments with moisture and grease exposure, teak and sapele perform well due to natural oil content providing some inherent moisture resistance. Oak is popular for its durability and grain character but requires thorough sealing. Avoid highly porous species like ash in kitchen areas unless finish system is exceptionally robust. Critical factors beyond species: ensure substrate is BWR or marine-grade plywood (not standard MDF), apply minimum three coats of quality polyurethane, and detail edges with solid wood lipping or thoroughly sealed veneer returns. Regular cleaning prevents grease buildup that damages finishes.
Why is fleece-backed veneer more expensive than paper-backed?
Fleece backing involves thicker, more stable textile backing material that costs more to produce and apply. The practical benefits justify the premium: fleece-backed veneer handles curves better without cracking, forgives minor substrate imperfections, and resists telegraphing through thin veneers. Paper-backed veneer requires more skill to apply successfully and struggles with curved surfaces. For DIY applications or inexperienced applicators, fleece-backed veneer's improved handling often prevents costly mistakes. The typical premium of ₹8–₹20 per square foot is worthwhile for complex applications or when working with expensive species.
How long does natural wood veneer furniture last compared to solid wood?
Well-made veneer furniture with proper construction and finishing can last 20–40+ years with appropriate care. Solid wood furniture can last generations with refinishing. The key difference: solid wood can be sanded and refinished repeatedly, while veneer allows only limited sanding (depending on thickness) before penetrating through to substrate. For furniture intended as heirloom pieces with multiple refinishing cycles, solid wood has advantages. For most practical applications where furniture may be updated before refinishing becomes necessary, quality veneer furniture offers comparable service life at lower cost with broader design possibilities.
Can veneer be stained to match existing furniture?
Yes, but with important caveats. Different wood species accept stain differently based on their natural density, grain pattern, and oil content. Test staining on a veneer sample from the same batch before committing. Some species (cherry, oak) stain predictably, while others (maple, birch) can blotch without proper conditioning. Pre-stain conditioner helps achieve more even results on blotch-prone species. Even with successful staining, matching existing furniture exactly is difficult because original furniture has aged and oxidized. Often, a complementary rather than identical match proves more successful aesthetically.
What is the minimum order quantity for quality veneer suppliers?
Minimum order requirements vary significantly by supplier. Large distributors may sell individual bundles (typically 24–32 sheets of roughly 2.5m x 0.3m), while importers of premium species may require full flitch purchases. For retail buyers needing small quantities, building material retailers in major cities often sell by the sheet at premium prices. For projects requiring specific matching, ordering a complete flitch ensures consistency but requires larger commitment. Discuss minimum quantities and pricing breaks with multiple suppliers—some offer better small-quantity pricing while others discount significantly for volume orders.
Disclaimer: This content is provided for general informational purposes based on industry practices and publicly available information. Product specifications, standards, prices, and availability may vary by manufacturer, region, and time. Readers should independently verify details with manufacturers, dealers, or qualified professionals before making purchase or construction decisions.Want Plywood Suggestions?
Share a few details and a Duro BOIL specialist will suggest suitable brands and connect you to responsive dealers.