Veneer Sheets: Types, Thickness, Uses & Buying Checklist (India 2026)
Learn what veneer sheets are, common types (natural/recon), thickness options, best uses, and a practical buying checklist to avoid poor finish and delamination.
Quick Decision Summary
Best answer in one line: Veneer sheets are thin slices of real or reconstituted wood applied over substrates to deliver a premium wood finish at lower cost than solid timber.
If you're in a hurry: Natural veneer delivers authentic grain character but demands careful storage and skilled application. Reconstituted (recon) veneer offers uniform patterns and easier handling at lower cost. For Indian conditions, always verify moisture content below 10–12%, confirm adhesive compatibility with your substrate, and insist on seeing the actual batch before purchase—colour and grain vary significantly between lots. Edge sealing and climate-controlled storage prevent most delamination and cracking failures.
- Choose veneer if: You want real wood aesthetics on MDF, plywood, or particle board without solid timber cost and weight.
- Avoid veneer if: The application involves continuous water exposure, extreme outdoor weathering, or high-impact zones where laminate durability is essential.
What Veneer Sheets Actually Mean in Indian Woodworking
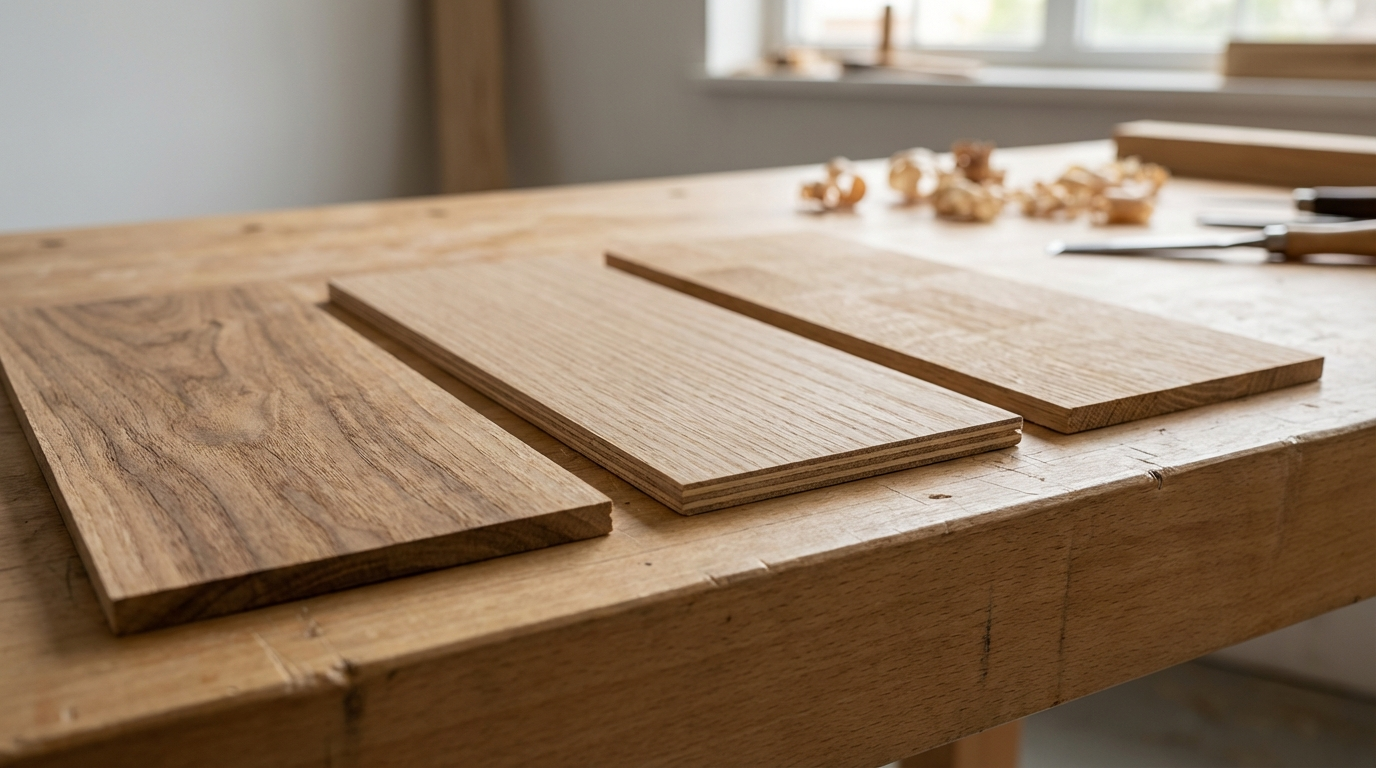
Veneer refers to thin slices of wood—typically 0.3mm to 1mm thick—peeled or sliced from logs and applied as a decorative face layer. Unlike laminates (which are synthetic resin-paper composites), veneer is actual wood with real grain variation. In India, veneer is commonly used on plywood, MDF, blockboard, and particle board to create furniture, doors, wall panels, and cabinetry that look like solid wood at a fraction of the cost and weight.
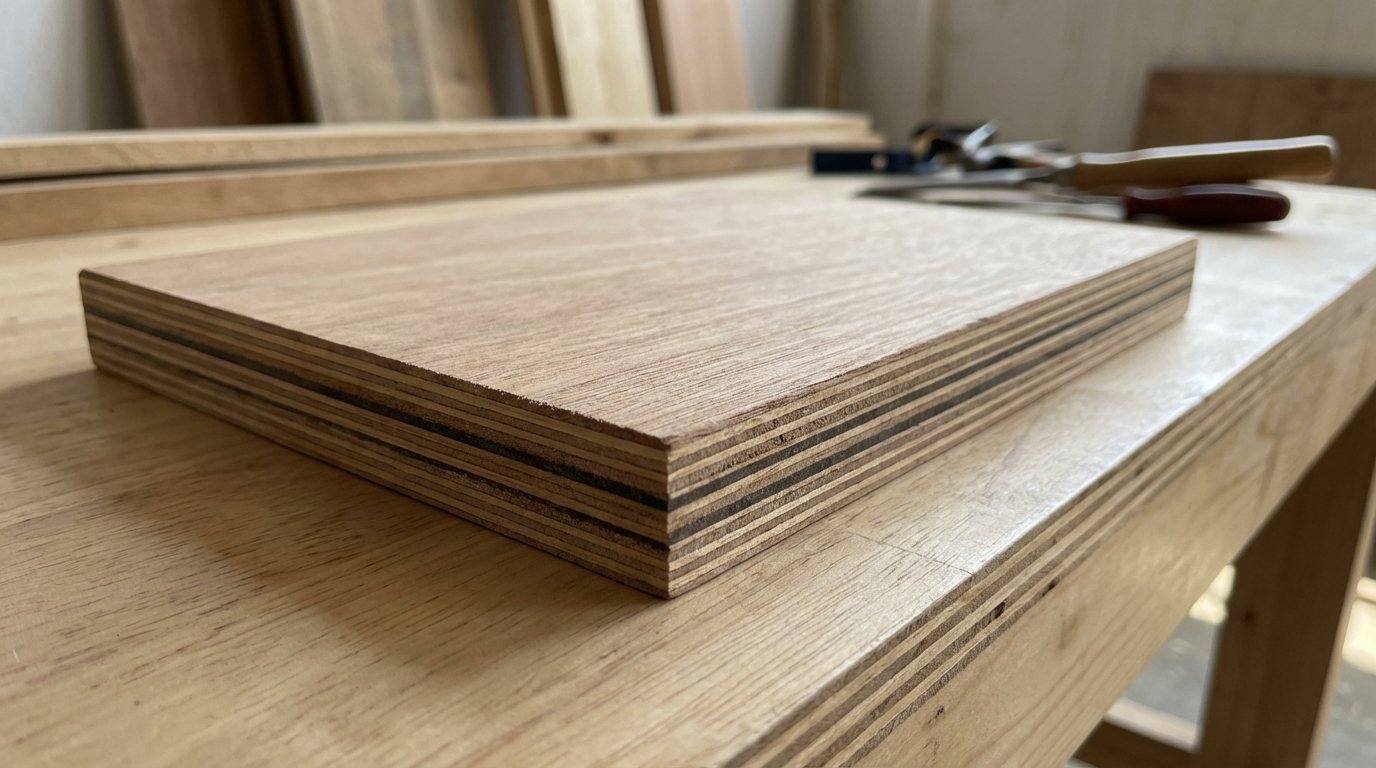
The substrate carries structural load; the veneer provides appearance. This distinction matters because veneer performance depends heavily on the substrate quality, adhesive choice, pressing method, and post-application finishing.
Where People Get Confused About Veneer
- Veneer versus laminate: Veneer is real wood; laminate is synthetic. Veneer can be sanded and refinished; most laminates cannot.
- Veneer versus solid wood: Veneer is a surface layer only—the underlying board provides strength and dimensional stability.
- Natural versus recon: Natural veneer comes directly from specific tree species; recon veneer is manufactured from fast-growing plantation wood processed to mimic exotic grains.
- Thickness confusion: Thicker veneer (0.5mm+) allows sanding and refinishing; thinner veneer (0.3mm) is single-use and more prone to sand-through damage.
- Pre-laminated panels versus raw veneer: Pre-laminated panels arrive with veneer already bonded; raw veneer sheets require on-site pressing or vacuum bagging.
India-Specific Reality Check
India's climate creates specific challenges for veneer selection, storage, and application that differ from temperate-region guidelines.
Monsoon and Coastal Humidity Impact
Veneer absorbs and releases moisture readily. In high-humidity zones—coastal cities, eastern India during monsoons—veneer can swell, buckle, or delaminate if the substrate moisture content differs significantly from the veneer. Always acclimatise veneer sheets in the actual installation environment for 48–72 hours before application. In coastal areas, consider using phenolic or PU adhesives over urea-formaldehyde options.
Storage and Handling on Indian Sites
Construction sites in India often lack climate control. Veneer stored in open warehouses or near window openings absorbs ambient moisture. Stack veneer flat on elevated pallets, cover with plastic sheeting, and avoid direct sunlight—UV degrades colour and causes brittleness. Never leave veneer bundles standing on edge; warping starts within days.
Workmanship Realities
Application quality varies dramatically between contractors. Cold pressing with contact adhesives is common but produces weaker bonds than hot pressing or vacuum bagging. Verify whether your fabricator has proper equipment for the veneer thickness and substrate combination you're specifying. Edge banding veneer requires different technique than laminate—inexperienced workers often crack veneer edges.
Types of Veneer Sheets Available in India
Natural Veneer
Sliced or peeled directly from timber species like teak, oak, walnut, rosewood, ash, and maple. Each sheet carries unique grain patterns—no two pieces are identical. Natural veneer commands premium pricing and requires skilled matching for large surfaces. Indian-origin teak veneer remains popular for traditional aesthetics; imported species (American walnut, European oak) serve contemporary designs.
Reconstituted (Recon) Veneer
Manufactured from plantation softwoods (typically poplar or obeche) that are dyed, sliced, and reassembled to simulate exotic species. Recon veneer offers consistent colour, uniform grain, and lower cost. It's easier to book-match across panels since variation is controlled. However, the grain lacks the depth and character of natural veneer, and close inspection reveals the manufactured pattern.
Smoked and Dyed Veneer
Natural veneer treated with ammonia smoking (for darker, aged appearance) or synthetic dyes (for fashion colours like grey, charcoal, or blue). These treatments penetrate the wood, but colour stability varies—some dyed veneers fade with UV exposure. Always request light-fastness information if the installation receives direct sunlight.
Fleece-Backed and Paper-Backed Veneer
Thin veneer laminated to a paper or fleece backing for easier handling and application on curved surfaces. The backing adds flexibility but prevents through-sanding. Paper-backed veneer works well for column wrapping and radius panels but is unsuitable where refinishing might be needed.
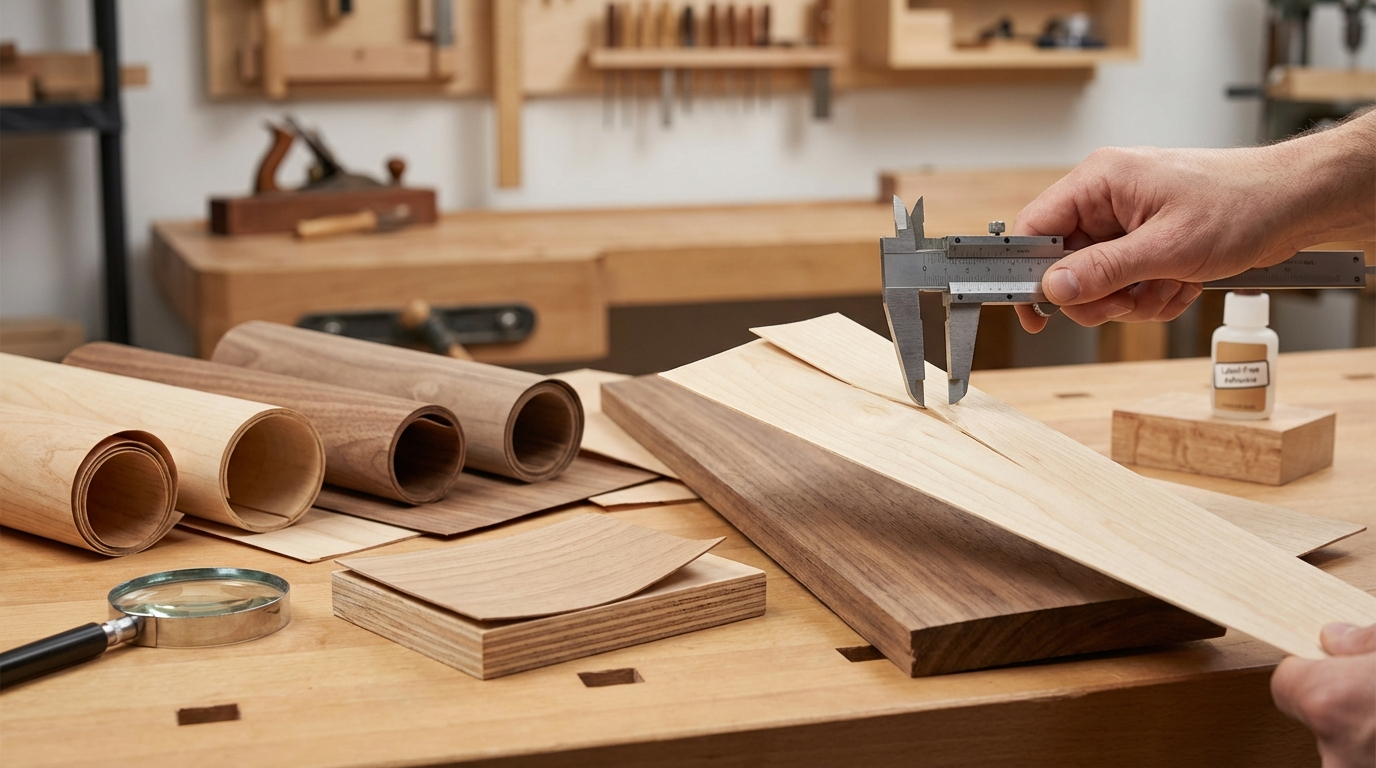
Thickness Options and What They Mean for Your Project
| Thickness Range | Typical Use | Refinishing Potential | Application Complexity |
|---|---|---|---|
| 0.3mm – 0.4mm | Factory pre-lamination, mass furniture | None—single use only | Requires precision equipment |
| 0.5mm – 0.6mm | Custom furniture, site-applied veneer | One light sanding cycle | Moderate—hot press or vacuum bag |
| 0.8mm – 1.0mm | Premium doors, high-end cabinetry | Two to three refinishing cycles | Higher—needs skilled handling |
| 1.5mm+ (thick-cut) | Restoration, marquetry, special applications | Multiple refinishing cycles | Specialist fabrication |
Thicker veneer costs more but provides insurance against sand-through during finishing and allows future restoration. For furniture expected to last 15+ years, specify 0.6mm minimum.
Does Thicker Veneer Always Mean Better Quality?
Not necessarily. Thickness determines refinishing potential, but actual quality depends on grain clarity, colour consistency, absence of defects (knots, cracks, mineral streaks), and proper slicing technique. A 0.5mm veneer from a premium log outperforms a 1mm veneer with excessive defects. Always inspect the specific batch—thickness is only one parameter.
Common Uses of Veneer Sheets in Indian Interiors
Furniture and Cabinetry
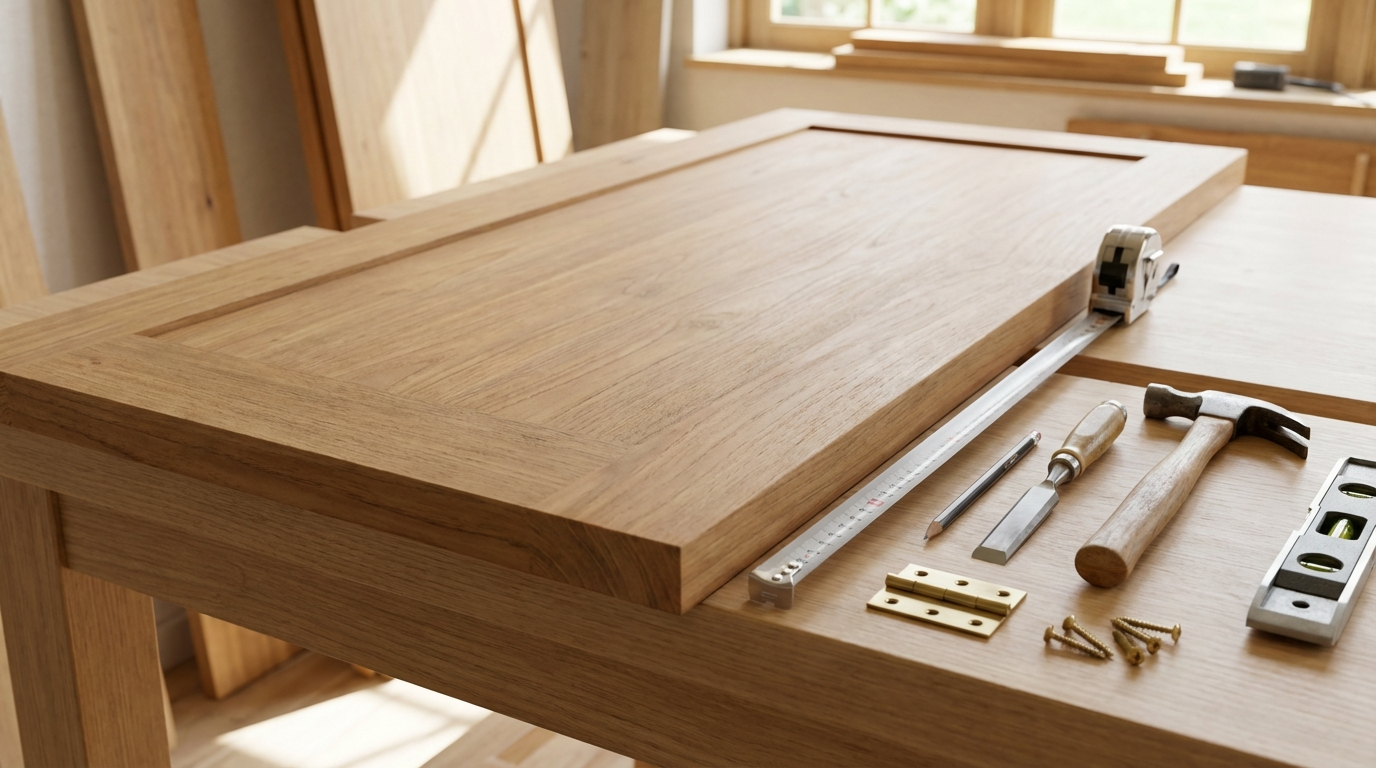
Wardrobes, TV units, sideboards, and modular kitchen shutters frequently use veneer to achieve wood aesthetics. MDF or plywood substrates provide stability; veneer adds visual warmth. In kitchens, specify veneer only for shutter faces—not sink zones or areas with direct water contact.
Doors and Door Frames
Veneer-faced flush doors offer solid wood appearance without the weight, cost, or warping risk of solid timber doors. Engineered core doors with veneer faces remain dimensionally stable across seasons. Specify cross-banded veneer application for doors to minimise face cracking.
Wall Panelling and Feature Walls
Large veneer panels create statement walls in living rooms, bedrooms, and offices. Book-matching (mirroring adjacent sheets) produces dramatic patterns. Ensure wall surfaces are moisture-sealed before veneer application—moisture migration from concrete walls causes delamination within months.
Ceiling Applications
Veneer on ceiling panels adds warmth to contemporary interiors. Weight is critical—use lightweight substrates and verify fixing adequacy. Avoid veneer ceilings directly below bathrooms or in spaces with roof leakage history.
How Does Natural Veneer Compare to Reconstituted Veneer?
| Parameter | Natural Veneer | Reconstituted Veneer |
|---|---|---|
| Grain authenticity | Unique, variable, natural character | Uniform, manufactured pattern |
| Colour consistency | Varies between logs and batches | Highly consistent within production runs |
| Matching large areas | Challenging—requires skilled selection | Easier—predictable appearance |
| Cost | Higher, especially for exotic species | Lower, more accessible |
| Availability | Species-dependent, some restricted | Readily available |
| Environmental concern | Check source legality for exotic species | Uses plantation timber |
Choose natural veneer when authenticity and character matter most—executive offices, heritage restoration, premium residences. Choose recon when budget, consistency, and timeline take priority—commercial fit-outs, hospitality projects, modular furniture.
Price Range and Cost Drivers (India)
Veneer pricing varies widely based on species, origin, thickness, grade, and market conditions. Use these ranges as directional guidance—always obtain current quotes from multiple suppliers.
Indicative Price Ranges (2026)
| Veneer Type | Approximate Range per sq ft |
|---|---|
| Indian teak (natural) | ₹25 – ₹80 |
| American walnut (natural) | ₹60 – ₹150 |
| European oak (natural) | ₹50 – ₹120 |
| Recon veneer (teak/oak look) | ₹15 – ₹40 |
| Smoked/dyed veneer | ₹40 – ₹100 |
| Fleece-backed veneer | ₹30 – ₹70 |
What Drives Veneer Cost?
- Species rarity: Exotic imported species cost significantly more than plantation-grown alternatives.
- Log quality: Clear, defect-free sections from premium logs command higher prices.
- Thickness: Thicker veneer requires more raw material and careful slicing.
- Grading: A-grade (minimal defects) versus B/C-grade (acceptable defects) creates price tiers.
- Certification: FSC or PEFC certified veneer may carry premiums.
- City and logistics: Metro pricing differs from tier-2/tier-3 city availability.
- Minimum order: Small quantities often cost more per unit than bulk purchases.
How to Ask for a Quote (Specification Checklist)
- Species name (botanical name preferred)
- Thickness in mm
- Sheet dimensions (length × width)
- Grade (A, B, C or manufacturer's grading system)
- Cut type (rotary, quarter-cut, flat-cut)
- Backing (raw, paper-backed, fleece-backed)
- Quantity required (include wastage factor—typically 15–20%)
- Delivery location and timeline
Decision Framework: Which Veneer for Which Condition?
| Condition / Requirement | Recommended Veneer Type | What to Verify |
|---|---|---|
| Coastal/high-humidity zone | Natural veneer with PU finish, thicker gauge | Substrate moisture content, adhesive type, edge sealing |
| Tight budget, large area | Recon veneer | Colour batch consistency, UV stability |
| Premium residence, visible grain | Natural veneer (quarter-cut for subtle grain) | Book-matching quality, log origin documentation |
| Curved surfaces | Paper-backed or fleece-backed veneer | Minimum bend radius, adhesive compatibility |
| Refinishing expected in future | 0.6mm+ thickness | Veneer thickness certification from supplier |
| Commercial project, fast timeline | Pre-laminated veneer panels | Panel flatness, edge quality, substrate grade |
| Direct sunlight exposure | Natural veneer with UV-resistant finish, avoid dyed veneer | Light-fastness rating if using dyed/smoked veneer |
Trade-offs and Limitations
Veneer Cannot Replace Laminate Everywhere
Veneer scratches more easily than high-pressure laminate. In high-traffic commercial settings, children's furniture, or kitchen work surfaces, laminate often outperforms veneer for durability. Veneer excels in appearance; laminate excels in abuse resistance.
Moisture Sensitivity Remains Real
Despite finishes and sealers, veneer is wood—it responds to humidity. In bathrooms, outdoor applications, or areas with water splashes, veneer will eventually fail. Use marine-grade laminates or solid surface materials instead.
Colour and Grain Matching Challenges
Natural veneer varies. Matching veneer across a large wardrobe or wall panel requires ordering from the same log bundle (called a "flitch"). Different batches will never match perfectly. Budget extra for selection and wastage.
Application Skill Dependency
Veneer application requires more skill than laminate. Bubbles, edge lifting, and finish defects are common with inexperienced fabricators. Verify your contractor's veneer-specific experience before committing.
Common Buyer Mistakes and How to Avoid Them
1. Ordering Without Seeing the Actual Batch
Why it happens: Buyers rely on sample boards or catalogue images that don't represent the specific lot being shipped.
What to do instead: Request photographs of the actual bundle or visit the warehouse. Approve specific sheets before cutting.
2. Ignoring Moisture Content Verification
Why it happens: Moisture meters aren't commonly used on site; suppliers rarely volunteer readings.
What to do instead: Ask for moisture content documentation. If unavailable, acclimatise veneer at site for 72 hours minimum and test substrate moisture too.
3. Specifying Veneer for Wet Zones
Why it happens: Designers prioritise aesthetics without considering long-term exposure.
What to do instead: Use veneer only on vertical surfaces away from direct water. For sink cabinets and bathroom vanities, choose marine-grade laminate.
4. Choosing Based on Price Alone
Why it happens: Recon veneer prices look attractive compared to natural; buyers assume appearance will be similar.
What to do instead: Request large samples (A4 size minimum) and view under project lighting. Understand that recon veneer looks uniform, not characterful.
5. Inadequate Wastage Allowance
Why it happens: Buyers calculate exact panel area without accounting for grain direction, matching, and cutting loss.
What to do instead: Add 15–25% wastage for natural veneer requiring matching; 10–15% for recon veneer.
6. Skipping Edge Sealing
Why it happens: Edge banding veneer is time-consuming; contractors skip or use tape instead of proper veneer edging.
What to do instead: Specify veneer edge banding in your contract. Inspect edges before final payment.
7. Using Contact Adhesive for Thick Veneer
Why it happens: Contact adhesive is convenient; fabricators avoid hot-press or vacuum-bag setups.
What to do instead: For veneer over 0.5mm, insist on hot pressing or vacuum bagging. Contact adhesive struggles with thickness.
8. Not Acclimatising Veneer Before Application
Why it happens: Timeline pressure pushes immediate application upon delivery.
What to do instead: Allow 48–72 hours acclimatisation in the installation space, especially during monsoon or in air-conditioned environments.
Failure Modes and Fixes
Delamination (Veneer Lifting from Substrate)
Symptom: Veneer edges lift; bubbles appear on flat surfaces.
Likely root cause: Moisture differential between veneer and substrate, inadequate adhesive coverage, insufficient pressing time/temperature.
Prevention: Match moisture content, use appropriate adhesive for conditions, ensure full pressing coverage.
If already happening: For small bubbles, inject PVA adhesive with syringe and clamp. For large delamination, professional re-veneering may be necessary.
Cracking Along Grain Lines
Symptom: Hairline cracks parallel to wood grain, especially on doors and large panels.
Likely root cause: Excessive drying after application (veneer shrinks), thin veneer over unstable substrate, lack of cross-banding.
Prevention: Use cross-banded veneer construction for large panels; apply finish promptly after veneering; avoid over-heated rooms.
If already happening: Minor cracks can be filled with matching wood filler and refinished. Deep cracks require panel replacement.
Colour Fading or Yellowing
Symptom: Veneer loses colour depth or turns yellowish, especially near windows.
Likely root cause: UV exposure degrades wood colour and certain finishes; dyed veneer fades faster.
Prevention: Use UV-resistant finish systems; avoid placing veneered furniture in direct sunlight; choose naturally stable species.
If already happening: Light sanding and refinishing can restore some colour; significant fading is permanent.
Sand-Through Damage
Symptom: Substrate visible through veneer after sanding/finishing.
Likely root cause: Thin veneer (under 0.4mm) combined with aggressive sanding or multiple refinishing attempts.
Prevention: Specify thicker veneer for surfaces requiring finishing. Train finishers on appropriate sanding grades (180+ grit, light pressure).
If already happening: Panel must be re-veneered or covered with laminate.
Veneer Curl During Storage
Symptom: Sheets curl at edges, become brittle, crack when handled.
Likely root cause: Improper storage—sheets stored on edge, exposed to humidity fluctuations, direct sun, or dry air-conditioning.
Prevention: Store flat, covered, elevated from floor, away from HVAC vents and windows.
If already happening: Mildly curled veneer can be flattened by misting lightly and pressing between flat boards. Severely damaged sheets should be rejected.
Finish Adhesion Failure
Symptom: Polish or lacquer peels off veneer surface in patches.
Likely root cause: Oily wood species not properly prepared, contaminated surface, incompatible finish system.
Prevention: Clean veneer with appropriate solvent before finishing; use compatible primer for oily species like teak; test finish adhesion on scrap first.
If already happening: Strip finish completely, prepare surface correctly, and refinish.
Quality Checks You Can Do Without Lab Tests
Before Buying: At the Supplier
- Visual inspection: Hold sheets against light—look for cracks, voids, uneven thickness, excessive knots, or mineral streaks.
- Flexibility test: Gently flex the sheet—it should bend without cracking. Brittle veneer indicates over-drying or age.
- Colour consistency: Compare multiple sheets from the same bundle; significant variation indicates poor sorting.
- Backing integrity: For backed veneer, check that backing is uniformly adhered without bubbles or gaps.
- Documentation request: Ask for species identification, thickness verification, and origin information.
After Cutting: At the Workshop
- Edge inspection: Cut edges should be clean without splintering or delamination.
- Grain alignment: Verify grain direction matches your design intent before gluing.
- Moisture check: If moisture meter available, verify 8–12% range. Otherwise, ensure veneer feels neither damp nor excessively dry and brittle.
After Installation: Quality Acceptance
- Bubble check: Run palm across all surfaces—no bubbles or soft spots should be detectable.
- Edge examination: All edges should be sealed—no exposed veneer edges or substrate visible.
- Colour match verification: Adjacent panels should match within acceptable tolerance; discuss acceptable variation upfront.
- Finish quality: Uniform sheen, no orange peel texture, no dust nibs, no runs or sags.
Tips for Homeowners
Daily Maintenance
- Dust with soft, dry cloth—avoid wet mopping.
- Wipe spills immediately; veneer absorbs moisture quickly.
- Use coasters under glasses and hot-pads under serving dishes.
- Avoid dragging objects across veneer surfaces—scratches are permanent.
What to Avoid
- Harsh chemical cleaners, abrasive pads, and furniture polishes containing silicone.
- Placing veneered furniture in direct sunlight without curtains or blinds.
- High-humidity environments without dehumidification—bathrooms, near aquariums, beside indoor plants with frequent watering.
Refinishing Considerations
If veneer appears worn after 10–15 years, professional refinishing is possible if thickness permits. Consult a restoration specialist before DIY attempts—sand-through is irreversible.
Tips for Carpenters and Fabricators
Cutting and Handling
- Use fine-tooth blades (80+ teeth for circular saws) to minimise edge chipping.
- Support veneer sheets fully during cutting—overhang causes cracks.
- Score veneer face before cutting to prevent tear-out.
- Handle sheets with clean, dry hands—oils transfer to porous surfaces.
Edge Preparation and Banding
- Sand substrate edges smooth before applying veneer edge banding.
- Apply edge veneer with grain direction matching face veneer.
- Use proper veneer edge trimmer—sharp blade, correct angle—to achieve flush finish.
- Seal end-grain edges with diluted adhesive before banding for better adhesion.
Fastening Zones and Hardware
- Pre-drill all screw holes through veneered surfaces to prevent cracking.
- Avoid driving screws too close to veneer edges—minimum 25mm inset.
- Use soft-close hardware to reduce impact stress on veneered doors.
Tips for Architects and Interior Designers
Specification Best Practices
- Specify veneer by species, thickness, cut type, grade, and finish requirement.
- Indicate grain direction on drawings—horizontal, vertical, or book-matched.
- Include "approved sample" clause requiring sign-off on actual batch before fabrication.
- Note acceptable colour variation tolerance in specifications.
Wet-Zone Precautions
- Do not specify veneer below 1200mm height in bathrooms.
- For kitchen applications, limit veneer to shutter faces—use laminate for carcass and sink-adjacent areas.
- Require PU or marine-grade finish for any veneer in high-humidity zones.
Detailing for Durability
- Detail shadow gaps at veneer panel joints to accommodate seasonal movement.
- Specify cross-banded veneer construction for panels exceeding 600mm width.
- Include edge protection details—metal angles, recessed reveals—for high-traffic veneer walls.
Tips for OEM and Modular Furniture Manufacturers
Repeatability and Quality Control
- Establish veneer procurement from consistent sources to maintain colour standards.
- Implement incoming inspection for moisture content, thickness, and defects.
- Create reference samples for each production batch—compare during QC.
Reducing Returns and Complaints
- Photograph veneered panels before dispatch—documentation prevents disputes.
- Include handling and maintenance instructions with every delivery.
- Use protective packaging—corner protectors, surface film—to prevent transit damage.
- Train installation teams on veneer-specific handling—no dragging, no wet cleaning immediately after installation.
Buying Checklist for Veneer Sheets
Before Ordering
- Define species and appearance expectation—natural character versus uniform pattern.
- Calculate quantity with wastage allowance (15–25%).
- Request actual batch photographs or warehouse visit.
- Confirm thickness in mm and verify this can be certified.
- Check adhesive compatibility with your chosen substrate.
At Receipt
- Inspect immediately—document any visible damage before accepting delivery.
- Compare received sheets against approved samples.
- Measure moisture content if meter available; otherwise check for brittleness or dampness.
- Store correctly immediately—flat, covered, elevated, climate-controlled.
During Fabrication
- Acclimatise veneer at installation site 48–72 hours minimum.
- Match grain and colour before cutting; mark sheets for assembly sequence.
- Verify adhesive coverage and pressing parameters before each batch.
- Seal all edges—no exposed veneer or substrate.
Final Acceptance
- Check for bubbles, colour match, edge quality, and finish uniformity.
- Document acceptance with photographs.
- Obtain maintenance guidelines from supplier/fabricator.
FAQs
What is the difference between veneer and laminate?
Veneer is thin sliced real wood applied as a decorative surface layer, retaining natural grain variation and allowing refinishing. Laminate is a synthetic product made from resin-impregnated paper, offering higher scratch and moisture resistance but without real wood characteristics. Veneer provides authentic wood appearance and can be sanded; laminate provides durability and consistency but cannot be refinished. Choose based on whether aesthetics or abuse resistance matters more for your application.
Can veneer be used in kitchens?
Yes, but with limitations. Veneer works well on shutter faces, tall unit exteriors, and breakfast counter fronts where direct water contact is unlikely. Avoid veneer near sinks, below cooking hobs, or on surfaces exposed to steam and splashes. In kitchen applications, always specify moisture-resistant substrates, PU or catalysed lacquer finishes, and complete edge sealing. For sink cabinets and dishwasher surrounds, marine-grade laminate remains more reliable.
How long does veneer furniture last in Indian conditions?
Well-made veneer furniture with proper substrate selection, quality adhesive, appropriate finish, and correct maintenance typically lasts 15–25 years in normal residential conditions. Coastal and high-humidity environments reduce lifespan; air-conditioned interiors extend it. Key factors include initial quality, installation skill, edge sealing completeness, finish quality, and owner maintenance habits. Thicker veneer (0.6mm+) allows one or two refinishing cycles, extending usable life further.
Why does veneer crack after a few months?
Cracking usually results from excessive moisture loss after installation—veneer shrinks as it dries in air-conditioned rooms or during dry winter months. Other causes include thin veneer over unstable substrates, lack of cross-banding on wide panels, or delayed finish application after veneering. Prevention involves using thicker veneer, cross-banded construction for large panels, prompt finishing after application, and avoiding placement near HVAC vents or in extremely dry environments.
Is natural veneer worth the extra cost over reconstituted veneer?
Natural veneer delivers authentic grain character, depth, and uniqueness that recon veneer cannot replicate. For premium residences, executive offices, or heritage restoration, natural veneer justifies its cost through appearance quality and property value enhancement. For commercial projects prioritising budget, consistency, and timeline, recon veneer offers excellent value with predictable aesthetics. The decision depends on project priorities—character versus uniformity, premium perception versus cost control.
How do I avoid colour mismatch when ordering veneer for large projects?
Order all veneer from a single "flitch" (bundle from one log) to ensure colour and grain consistency. Request the supplier to reserve sufficient quantity from one flitch before confirming order. Visit the warehouse to inspect and approve specific bundles. For very large projects requiring multiple flitches, have the supplier grade and sort sheets by colour tone, then plan panel layout to place similar-toned sheets in adjacent positions. Always include 15–25% extra for selection wastage.
What finish is best for veneer in humid climates?
PU (polyurethane) finishes offer the best moisture protection for veneer in humid Indian conditions. Catalysed lacquers also perform well when properly applied. Avoid nitrocellulose lacquer in coastal areas—it offers minimal moisture barrier. For maximum protection, specify 2K PU systems with appropriate sealer coats. Ensure complete edge sealing regardless of face finish—unsealed edges allow moisture ingress that causes delamination from within.
Can I refinish veneer furniture myself?
DIY refinishing is possible for minor wear on thick veneer (0.6mm+), but requires care and correct technique. Sand only with fine grit (220+), use light pressure, and work with grain direction. Test finish adhesion on hidden area first. For thin veneer or significant damage, professional refinishing is recommended—sand-through is irreversible and ruins the piece. When in doubt, consult a restoration specialist before attempting DIY.
Disclaimer: This content is provided for general informational purposes based on industry practices and publicly available information. Product specifications, standards, prices, and availability may vary by manufacturer, region, and time. Readers should independently verify details with manufacturers, dealers, or qualified professionals before making purchase or construction decisions.Want Plywood Suggestions?
Share a few details and a Duro BOIL specialist will suggest suitable brands and connect you to responsive dealers.