Veneer Sheets: Types, Thickness, Finishes & How to Buy Veneer Without Regrets
A buyer-friendly veneer sheets guide—types, thickness, finishes, and practical checks to pick durable veneer for furniture, doors and wall panels.
Quick Decision Summary
Best one-line answer: Choose veneer thickness and backing based on your substrate, application stress, and finishing method—not just appearance.
If you're in a hurry: Natural veneer sheets typically range from 0.25mm to 4mm thick, with 0.5mm being most common for furniture and doors in India. Thinner veneers suit flat surfaces with good substrates; thicker cuts handle curves, high-traffic edges, and sanding corrections better. Always check grain direction, backing type (paper-backed vs raw), and moisture content before purchase. Buy 10–15% extra for grain matching and wastage. Confirm the veneer is properly stored flat in controlled humidity—warped or cracked sheets from poor storage are the most common regret.
- Choose veneer if: You want real wood aesthetics at lower cost than solid timber, need consistent grain patterns across large surfaces, or want exotic species unavailable as solid lumber.
- Avoid veneer if: The substrate is poor quality, edges will see heavy impact, you cannot control humidity during storage and application, or you need deep sanding/refinishing later.
What Veneer Sheets Actually Mean in Plain Terms
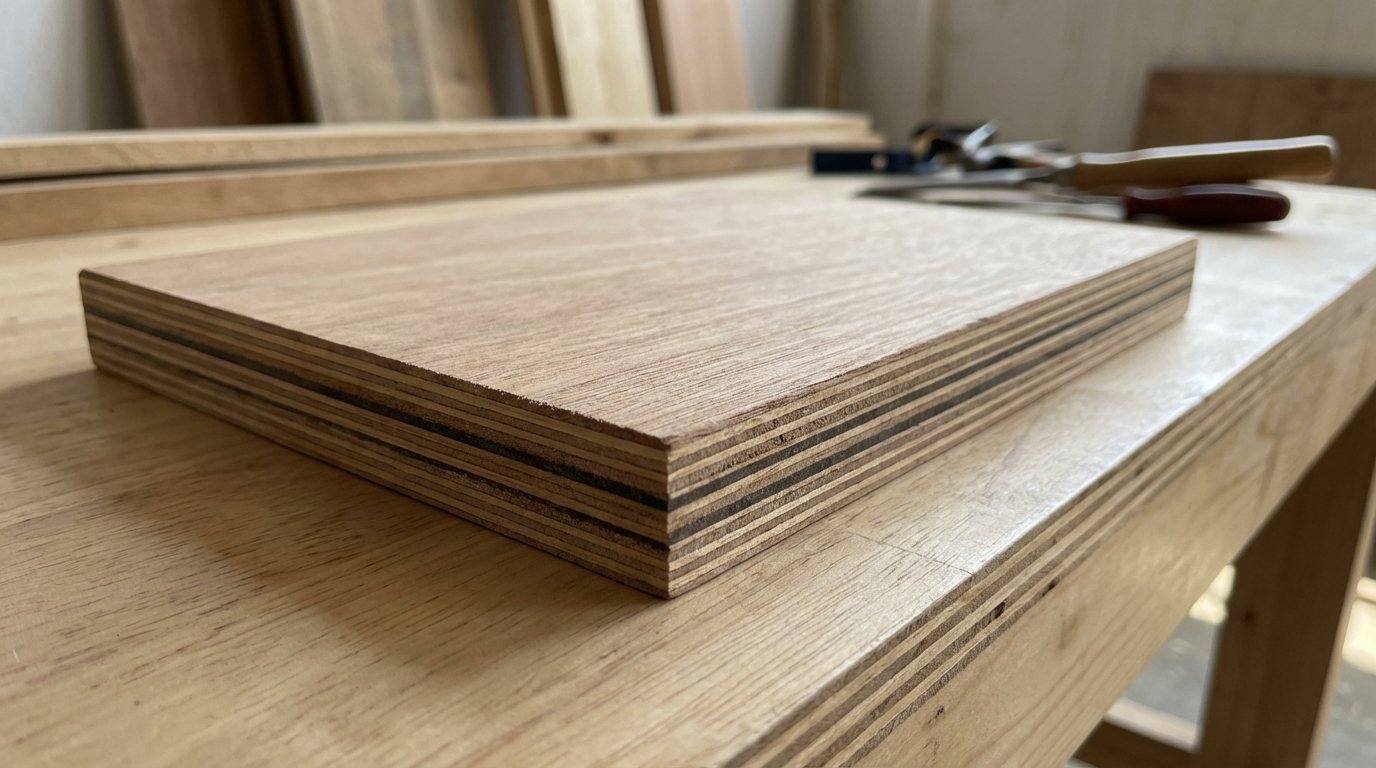
Veneer is a thin slice of real wood—peeled, sliced, or sawn from a log—that gets bonded to a substrate like plywood, MDF, or blockboard. Unlike laminate (which is printed paper with resin), veneer is genuine timber with natural grain variations. In India, veneer is sold either raw (unfinished), paper-backed (for easier handling), or pre-finished (with lacquer or polish applied).
The source log, cutting method, and thickness determine both appearance and workability. Rotary-cut veneer shows broad, swirling patterns; quarter-sliced veneer displays straight, uniform grain. Understanding this distinction prevents mismatched panels in your final furniture.
Where People Get Confused About Veneer
- Veneer vs laminate: Veneer is real wood; laminate is synthetic. They behave differently with moisture, scratches, and repair.
- Thickness claims: Sellers often quote "face thickness" (just the wood layer) vs "total thickness" (wood plus paper backing). Clarify which measurement you're getting.
- Species names: Marketing names like "golden teak" or "natural walnut" may not match botanical species. Always confirm the actual wood species.
- Pre-finished vs raw: Pre-finished veneer saves polishing time but limits your finishing options and may show seams differently.
- Grain matching: Consecutive sheets from the same flitch (log section) are needed for book-matching or slip-matching. Random sheets won't align aesthetically.
- Substrate assumption: Veneer alone has no structural strength—it must be bonded to something. The substrate quality directly affects veneer longevity.
India-Specific Reality Check for Veneer Selection
India's climate creates unique challenges for veneer work that standard international guides often miss. Relative humidity swings from 40% in peak summer to 90%+ during monsoon in coastal and central regions. This causes wood to expand and contract, stressing veneer bonds and potentially causing cracks, bubbles, or delamination.
Monsoon storage risk: Veneer sheets stored in open godowns or near construction sites often absorb moisture before installation. Once bonded to a substrate, this trapped moisture causes bubbles within weeks. Always check storage conditions and ask how long the stock has been held.
Coastal and high-humidity zones: In cities like Mumbai, Chennai, Kolkata, and Goa, even interior furniture sees sustained high humidity. Thicker veneers (0.6mm+) with proper sealing on all edges perform better than ultra-thin options. Paper-backed veneer can absorb moisture through the backing if edges are left exposed.
Contractor workflow realities: Many carpenters apply veneer on-site without temperature or humidity control. This leads to adhesive failure, especially with contact cement in hot weather. PVA or synthetic resin adhesives with proper clamping time work better but require more skill and equipment.
Transport and handling: Veneer sheets are fragile. Improper stacking during transport from dealer to site causes cracks along grain lines. Inspect every sheet before accepting delivery—damage claims afterward are rarely honored.
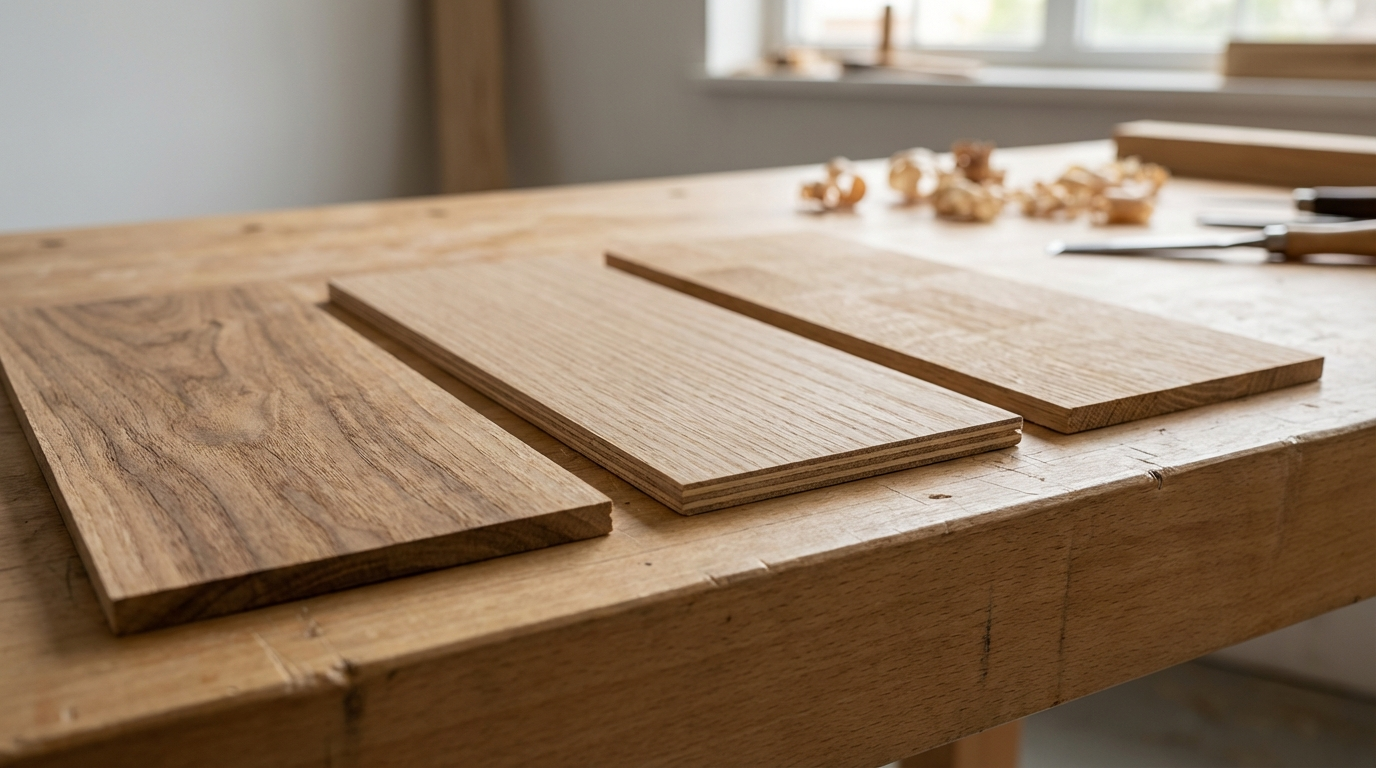
Types of Veneer Sheets Available in India
By Cutting Method
| Cutting Method | Grain Pattern | Typical Use | Cost Range |
|---|---|---|---|
| Rotary Cut | Broad, wavy, cathedral-like | Plywood faces, large panels | Lower |
| Plain/Flat Sliced | Cathedral center, straight edges | Furniture, doors | Medium |
| Quarter Sliced | Straight, uniform lines | Premium furniture, wall panels | Higher |
| Rift Cut | Pencil-straight grain | Modern minimalist designs | Higher |
By Backing Type
- Raw veneer: No backing. Requires skilled handling. Best for professional veneer work with vacuum pressing.
- Paper-backed veneer: Tissue or kraft paper bonded to back. Easier to handle, less prone to cracking during application. Standard choice for most Indian furniture makers.
- Fleece-backed veneer: Non-woven fabric backing. More flexible, handles curves better. Costlier but useful for bent panels.
- Pre-glued veneer (iron-on): Adhesive pre-applied. Convenient for small repairs or DIY. Bond strength lower than professional adhesives.
By Wood Species (Common in India)
- Teak: Golden-brown, excellent durability, high cost. Often used for doors and premium furniture.
- Walnut: Dark brown with dramatic grain. Popular for modern interiors. Mostly imported.
- Oak: Pale with prominent grain. Good for Scandinavian-style furniture. Imported.
- Sapele: Reddish-brown, ribbon-stripe figure. Good teak alternative at lower cost.
- Ash: Light color, strong grain pattern. Works well with light stains.
- Engineered/Reconstituted veneer: Dyed and reconstructed from fast-growing species. Consistent color and pattern. Lower cost but less "authentic" appearance.
How Does Veneer Thickness Affect Performance and Application?
Thickness is the most misunderstood veneer specification. Thicker isn't automatically better—it depends on your application, substrate, and finishing requirements.
0.25mm–0.4mm (ultra-thin): Used primarily for factory-applied faces on pre-veneered boards. Too thin for site application. Cannot be sanded after bonding. Any substrate imperfection telegraphs through. Choose only for controlled factory conditions with excellent substrates.
0.5mm–0.6mm (standard): The workhorse thickness for Indian furniture and doors. Allows light sanding for finishing. Tolerates minor substrate imperfections. Works with contact cement or PVA adhesives. This is what most dealers stock.
0.8mm–1.5mm (medium): Better for edges, curved surfaces, and applications needing multiple sanding passes. Provides more margin for error during finishing. Costlier but more forgiving. Recommended for high-end work or less experienced applicators.
2mm–4mm (thick/micro-lumber): Behaves more like thin solid wood. Can be finished with deep sanding and profiling. Used for decorative panels, restoration work, and applications where longevity under wear is critical. Requires proper acclimatization and careful adhesive selection.
What Happens If You Choose the Wrong Thickness?
Too thin on imperfect substrate: Every void, scratch, and particle shows through after finishing. The veneer may crack over bumps during bonding.
Too thick without proper pressing: Adhesive doesn't penetrate evenly, causing localized delamination. Thick veneer also requires longer clamping time.
Too thin for edge application: Cracks and chips within months of use, especially on door edges and table corners.
Veneer Finishes and Their Trade-offs
Should You Buy Pre-Finished or Raw Veneer?
Raw veneer gives you complete control over staining, sealing, and final sheen. You can match existing furniture exactly and achieve custom colors. However, it requires skilled finishing work, proper dust-free conditions, and more time.
Pre-finished veneer saves labor and time—the lacquer or oil is factory-applied. But you lose flexibility: the sheen level is fixed, seams may show differently, and touch-up is harder. Pre-finished veneer works well for wall panels and areas that won't see heavy wear.
Practical advice: For doors and furniture tops that need seamless appearance, raw veneer with on-site finishing typically looks better. For large wall panels in commercial spaces where speed matters, pre-finished veneer reduces project time significantly.
What Finish Sheen Works Best for Different Applications?
- Matte/satin (10–30% sheen): Hides imperfections, shows less dust, contemporary look. Best for living rooms and bedrooms.
- Semi-gloss (40–60% sheen): Balances aesthetics and practicality. Common for furniture and doors.
- High gloss (70%+ sheen): Dramatic but unforgiving. Shows every dust particle, fingerprint, and substrate imperfection. Requires flawless preparation.
Price Range and Cost Drivers for Veneer in India
Veneer pricing varies dramatically based on species, thickness, backing, and source. Use these ranges as directional guides—always get specific quotes for your requirements.
| Category | Approximate Range (₹ per sq ft) | Key Cost Drivers |
|---|---|---|
| Reconstituted/Engineered | ₹15–₹45 | Dye quality, pattern complexity |
| Common hardwoods (sapele, ash) | ₹40–₹90 | Thickness, backing type, grain figure |
| Teak (natural) | ₹80–₹200+ | Grade, figure, plantation vs old-growth |
| Imported exotics (walnut, oak) | ₹120–₹350+ | Import duties, availability, thickness |
| Burls and figured veneers | ₹200–₹800+ | Rarity, log quality, pattern uniqueness |
Additional cost factors:
- Paper-backed adds ₹5–₹15 per sq ft over raw veneer
- Pre-finished adds ₹20–₹50 per sq ft over raw
- Consecutive flitch sheets for matching cost 10–20% more than random stock
- Minimum order quantities often apply—small orders may have higher per-unit pricing
How to Ask for a Veneer Quote Properly
Specify these details to get accurate, comparable quotes:
- Species (botanical or trade name)
- Thickness (in mm, face only vs total)
- Backing type (raw, paper-backed, fleece)
- Cut type (rotary, flat-sliced, quarter-sliced)
- Quantity needed in sq ft (including 15% wastage allowance)
- Grain matching requirements (random vs sequential sheets)
- Delivery location (affects logistics cost)
Trade-offs and Limitations of Veneer
Understanding what veneer cannot do prevents costly mistakes:
Cannot hide poor substrates: If your plywood or MDF has voids, rough patches, or inconsistent density, the veneer will telegraph these flaws. Always use high-quality, calibrated substrates.
Limited impact resistance: Veneer is thin wood. Sharp impacts, heavy scratches, or pet claws can penetrate through to the substrate. It's not suitable for environments expecting abuse.
Moisture sensitivity: Despite being bonded to moisture-resistant substrates, veneer itself expands and contracts with humidity. In uncontrolled environments, cracks along grain lines develop over time.
Repair complexity: Unlike laminate (which is often replaced entirely), veneer damage often requires skilled patching or full panel replacement. Touch-up pens and fillers rarely match natural wood grain.
Color variation: Even sheets from the same flitch show natural variation. Achieving perfect uniformity across a large project requires careful selection and may mean rejecting some material.
UV sensitivity: Most wood species darken or fade with sunlight exposure. Furniture near windows changes color unevenly. UV-blocking finishes help but don't eliminate this.
Common Buyer Mistakes and How to Avoid Them
Mistake 1: Buying based on sample color alone
Why it happens: Showroom samples are cut from different logs than production stock. Lighting conditions differ.
What to do instead: Request samples from the actual batch you'll purchase. View under natural daylight and artificial light. Accept that some variation is unavoidable.
Mistake 2: Ignoring substrate quality
Why it happens: Focus on veneer species while using cheap plywood or particle board underneath.
What to do instead: Budget for calibrated plywood or high-density MDF. The substrate affects bond strength, durability, and finished appearance equally to veneer choice.
Mistake 3: Not ordering consecutive sheets for visible areas
Why it happens: Dealers sell random sheets from multiple flitches without explaining matching requirements.
What to do instead: For doors, wardrobe fronts, and tables, specify "sequential sheets from same flitch" and verify before purchase.
Mistake 4: Underestimating wastage
Why it happens: Calculating area exactly without grain-matching waste, cutting waste, or defect allowance.
What to do instead: Add 15–20% for grain matching on prominent surfaces; 10–12% for concealed areas.
Mistake 5: Storing veneer improperly before use
Why it happens: Sheets left leaning against walls, exposed to sun, or in humid conditions on site.
What to do instead: Store flat, weighted evenly, in air-conditioned or dehumidified space. Use within 1–2 weeks of delivery in humid climates.
Mistake 6: Using contact cement in high-temperature conditions
Why it happens: Contact cement is fast and convenient, but it fails when applied above 35°C or below 18°C.
What to do instead: Use PVA or synthetic resin adhesives with proper clamping in hot climates. Allow adequate open time.
Mistake 7: Skipping test bonds
Why it happens: Assuming adhesive and veneer will work together without verification.
What to do instead: Bond a small test piece to the actual substrate with your chosen adhesive. Test peel strength after 24 hours before committing to the full project.
Mistake 8: Not sealing edges and backs
Why it happens: Visible faces are finished; backs and edges are left raw to save time.
What to do instead: Seal all surfaces with primer or sealer to balance moisture exchange. Unsealed backs cause cupping and warping.
Mistake 9: Expecting perfect repairs
Why it happens: Assuming veneer damage can be touched up like paint.
What to do instead: Handle veneered surfaces carefully. Accept that repairs are visible on close inspection. For high-traffic areas, consider thicker veneer or protective glass/acrylic overlays.
Failure Modes and Fixes for Veneer Applications
Bubbles or Blisters After Installation
Symptom: Raised areas that feel hollow when tapped, often appearing days or weeks after installation.
Root cause: Adhesive didn't bond completely—either insufficient pressure, wrong adhesive open time, moisture trapped under veneer, or contaminated substrate surface.
Prevention: Use proper pressure (vacuum bag, veneer press, or even distributed weights). Ensure substrate is clean and dust-free. Check moisture content of both veneer and substrate.
Fix if happening: For small bubbles, inject adhesive through a syringe via pinhole, then re-press. For large areas, carefully lift veneer edge, reapply adhesive, and re-clamp.
Cracks Along Grain Lines
Symptom: Hairline splits following the wood grain, especially visible after finishing.
Root cause: Veneer was too dry, substrate expansion/contraction, or finishing was done before veneer stabilized to room humidity.
Prevention: Acclimatize veneer for 48–72 hours in installation environment. Use flexible finishes in high-humidity-variation areas. Avoid ultra-thin veneer on large unsupported spans.
Fix if happening: Fill with color-matched wood filler for minor cracks. Severe cracking may require stripping and re-veneering.
Edge Lifting or Peeling
Symptom: Veneer edges curling up or separating from substrate, especially on doors and tabletops.
Root cause: Impact damage, moisture penetration through unsealed edges, or adhesive failure from heat/humidity cycling.
Prevention: Apply solid wood lipping or edge banding. Seal all edges before and after veneering. Use appropriate adhesive for the application.
Fix if happening: Apply fresh adhesive under lifted edge using thin spatula, clamp until cured. Add protective edge treatment afterward.
Color Mismatch Between Panels
Symptom: Adjacent veneered panels showing noticeably different shades or grain patterns.
Root cause: Non-sequential sheets used, different stain absorption rates, or inconsistent finishing coats.
Prevention: Use sequential sheets from same flitch. Apply stain and finish with consistent technique across all panels. Number panels during cutting to maintain orientation.
Fix if happening: Limited options—may require additional stain coats to blend, or replacing mismatched panels in severe cases.
Telegraphing (Substrate Showing Through)
Symptom: Substrate texture, voids, or patterns visible through finished veneer surface.
Root cause: Veneer too thin for substrate condition, insufficient adhesive, or substrate defects.
Prevention: Use calibrated, void-free substrates. Choose appropriate veneer thickness (0.5mm minimum for most site applications). Fill substrate voids before veneering.
Fix if happening: No good fix exists—prevention is critical. Replacement is usually necessary for visible surfaces.
Finish Adhesion Failure
Symptom: Polish or lacquer peeling, flaking, or showing white marks.
Root cause: Contaminated surface (oils from handling, dust, old polish residue), incompatible finish system, or insufficient drying time between coats.
Prevention: Sand lightly and clean with appropriate solvent before finishing. Use compatible primer-sealer-topcoat systems. Follow manufacturer's recoat windows.
Fix if happening: Strip failed finish completely, prepare surface properly, and refinish.
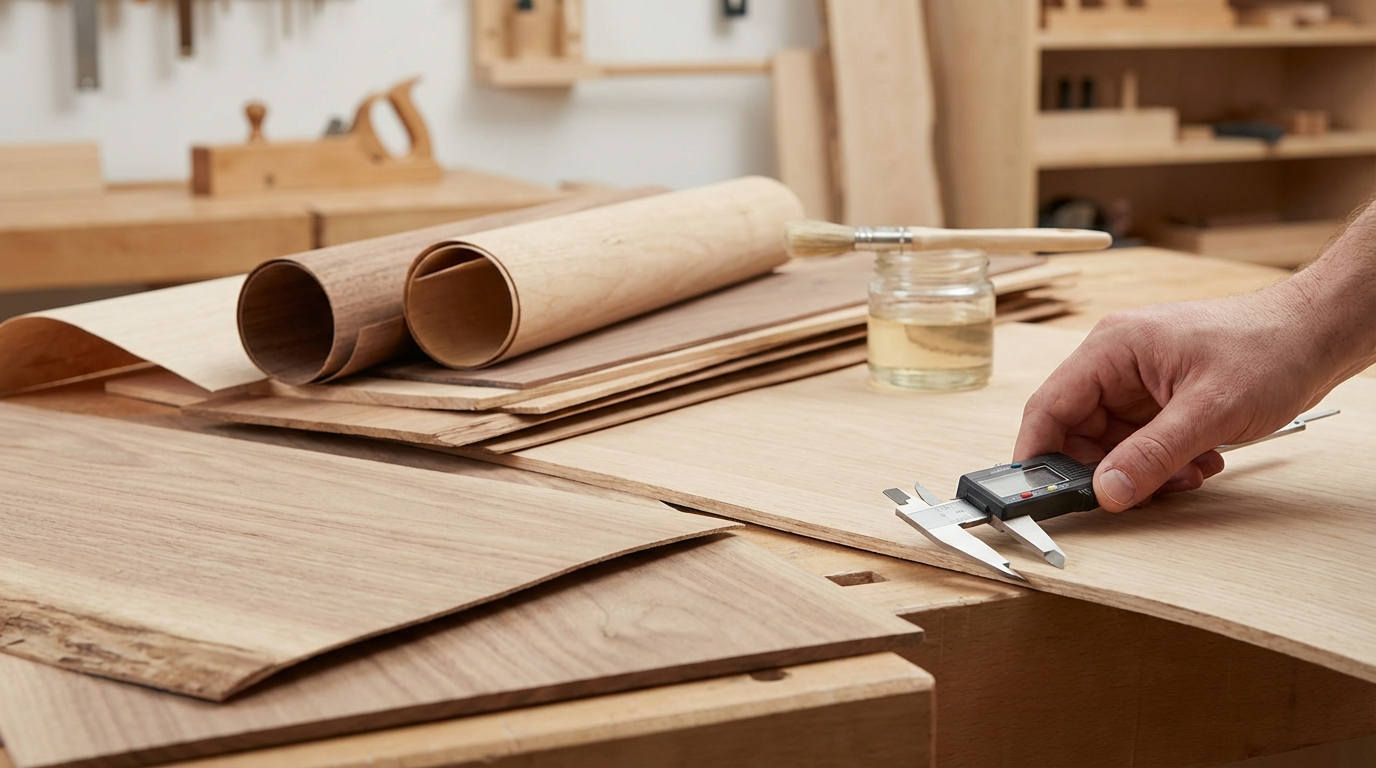
Quality Checks You Can Do Without Lab Tests
Before Buying
- Flexibility test: Gently bend a sheet—it should flex without cracking. Brittle veneer is either too dry or has internal defects.
- Backlight check: Hold sheet against light source. Thin spots, holes, or cracks become visible.
- Surface inspection: Look for sanding scratches, tear-out, or filler patches. Run hand across surface—it should feel smooth and consistent.
- Moisture check: If veneer feels damp or storage area is humid, reconsider. Ask about storage duration and conditions.
- Grain consistency: For matching applications, lay out sheets and check grain flow continuity.
- Backing adhesion: For paper-backed veneer, check that backing is fully adhered with no bubbles or loose areas.
After Cutting
- Edge quality: Cuts should be clean without excessive splintering. Excessive tear-out suggests dull blades or wrong cutting direction.
- Veneer lies flat: Cut pieces should lie flat without excessive curling. Some curl is normal but extreme curling indicates moisture imbalance.
- No hidden defects: Check cut edges for internal voids or delamination in backed veneers.
After Installation
- Tap test: Tap across bonded surface with knuckle. Hollow sound indicates unbonded areas.
- Visual inspection under raking light: Place light source at sharp angle to surface. Imperfections, bubbles, and telegraphing become visible.
- Edge seal check: All edges should be sealed before finishing. Run finger along edges to confirm coating coverage.
- 48-hour cure check: Before heavy use or final finishing, allow adhesive to fully cure and check for any developing issues.
Decision Framework: Which Veneer Specification for Your Situation
| Condition | Recommended Choice | What to Verify |
|---|---|---|
| Humid climate or coastal location | 0.6mm+ thickness, synthetic resin adhesive, full edge sealing | Storage conditions, adhesive compatibility, sealer type |
| High-traffic furniture tops | 0.8mm+ thickness, hard finish (PU/melamine) | Substrate density, finish hardness rating |
| Wall panels (low wear) | 0.5mm standard, can use pre-finished | Substrate flatness, installation environment control |
| Door faces | 0.5–0.6mm paper-backed, natural species, matched pairs | Sequential sheets, edge treatment plan |
| Curved surfaces | Fleece-backed or thin raw veneer with vacuum bagging | Minimum bend radius, adhesive open time |
| Budget-conscious project | Reconstituted veneer on MDF | Pattern consistency, finish compatibility |
| Premium appearance required | Quarter-sliced natural species, 0.6mm+, book-matched | Flitch sequence, grain figure quality, finishing plan |
| Fast project timeline | Pre-finished veneer or pre-veneered boards | Color match to other elements, edge treatment options |
Practical Tips for Different User Types
For Homeowners
- Durability expectations: Veneer is real wood—it will develop patina and character over time. This is normal, not a defect.
- Cleaning: Use slightly damp cloth, not wet. Avoid silicone-based polishes that build up. Dust regularly to prevent abrasive particle damage.
- Sun protection: Rotate decorative items on veneered surfaces to prevent uneven fading. Use curtains or UV-film on windows near veneered furniture.
- Humidity control: During monsoon, air conditioning or dehumidifiers help prevent moisture-related issues.
- Avoid: Hot vessels directly on surface, dragging objects, abrasive cleaners, excessive water near edges.
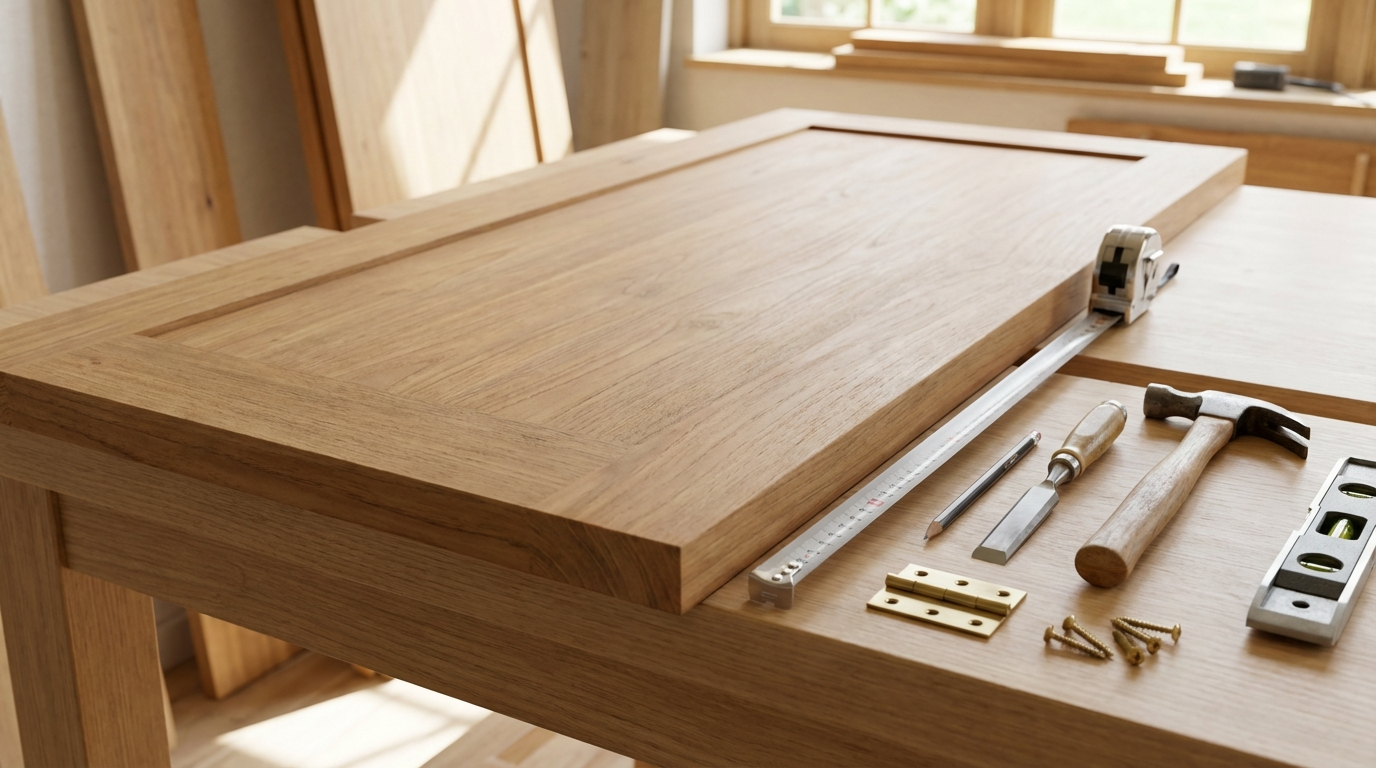
For Carpenters and Woodworkers
- Cutting: Use sharp, fine-toothed blades. Score veneer face before cutting to prevent tear-out. Cut with grain direction when possible.
- Edge preparation: Veneer edges are fragile. Apply edge banding or solid lipping before handling gets rough.
- Adhesive selection: Match adhesive to working conditions. Contact cement for controlled temperatures, PVA for longer open time, synthetic resin for moisture resistance.
- Pressing: Even pressure is critical. Vacuum bags give best results for curved work. For flat work, cauls and distributed weights work if veneer press unavailable.
- Grain direction: Book-match requires attention to which side faces up. Mark sheets clearly before cutting.
- Hinge/hardware zones: Reinforce areas where screws will penetrate. Veneer alone has minimal screw-holding strength.
For Architects and Interior Designers
- Specification clarity: Specify species, cut type, thickness, backing, matching requirements, and finish separately. Vague specs lead to substitutions.
- Detailing for longevity: Design edge treatments and joints to prevent moisture ingress. Avoid designs requiring veneer on external surfaces without proper protection.
- Wet zone precautions: Veneer in bathrooms and kitchens needs thicker material, waterproof adhesive, comprehensive sealing, and maintenance access for inevitable repairs.
- Sample approval process: Approve samples from actual production batch, not generic showroom samples. Document approved sample for reference during installation.
- Finish logic: Coordinate veneer finish with other materials in space. Veneer can be finished to match or contrast other wood elements.
For OEM and Modular Furniture Makers
- Consistency: Order full project requirements from single lot/flitch. Reorders from different batches will show variation.
- QC checkpoints: Inspect incoming veneer for thickness consistency, moisture content, backing adhesion. Reject sheets outside tolerance before they enter production.
- Reducing returns: Most complaints stem from substrate issues, edge treatment failures, or finish problems—not veneer quality itself. Focus QC on these areas.
- Pre-veneered board option: For high-volume production, factory-veneered MDF or plywood with consistent quality may be more reliable than site veneering.
- Storage protocols: Maintain controlled storage with consistent humidity. Stock rotation prevents aging-related issues.
How to Buy Veneer Without Regrets: Complete Checklist
Before Visiting the Dealer
- Calculate area needed plus 15–20% wastage allowance
- Decide on species, thickness, and backing requirements
- Determine grain matching needs for your design
- Know your substrate specifications
- Understand your finishing plan (site-finished or pre-finished)
At the Dealer
- Ask to see actual stock, not just samples
- Check storage conditions
- Inspect sheets for defects using backlight and surface feel tests
- Confirm thickness measurement method (face vs total)
- Request consecutive sheets from same flitch if matching required
- Get pricing in writing with all specifications documented
- Ask about return policy for damaged or unsuitable material
At Delivery
- Inspect every sheet before signing acceptance
- Check for transport damage (cracks, chips, moisture damage)
- Verify quantity and specifications match order
- Document any issues with photos immediately
Before Installation
- Store flat in controlled environment for 48–72 hours minimum
- Lay out and plan cutting to minimize waste and optimize grain matching
- Prepare substrate properly—fill voids, sand smooth, remove dust
- Test adhesive bond on scrap piece
FAQs About Veneer Sheets
What is the standard thickness of veneer sheets used for furniture in India?
The most commonly used thickness for furniture applications in India is 0.5mm to 0.6mm with paper backing. This provides adequate durability for careful handling while remaining economical. For high-traffic surfaces like dining tables or commercial furniture, 0.8mm to 1mm offers better longevity. Factory-applied faces on pre-veneered boards are often thinner (0.25–0.4mm) but these are not suitable for site application. Always verify the measurement refers to the wood face thickness alone, not including any backing material, as some suppliers quote total thickness which can be misleading.
Can veneer be used in bathrooms and wet areas?
Veneer can be used in wet-adjacent areas with proper precautions, but it requires careful planning. Choose thicker veneer (0.6mm+), use waterproof synthetic resin adhesive, apply on marine-grade or BWP plywood substrate, and seal all surfaces including backs and edges with waterproof finish. Even with these measures, direct water contact should be avoided—veneer is not suitable for surfaces that get regularly wet. For bathroom vanities, ensure water cannot pool around edges and maintain finish integrity with periodic recoating. In high-humidity zones, expect more maintenance than in dry areas.
How do I match veneer grain across multiple panels?
Grain matching requires purchasing consecutive sheets from the same flitch—a flitch being a section of log that's sliced sequentially. Inform your dealer that you need matched sheets and verify they come in sequence, often marked with numbers. Common matching patterns include book-matching (alternating sheets flipped like book pages for mirror-image effect), slip-matching (sheets laid same-side-up for repeating pattern), and random matching (no specific pattern, suitable for less visible areas). Plan your layout before cutting, mark each piece's position, and maintain orientation during installation. Color and grain will still vary slightly—this is inherent to natural wood.
What adhesive should I use for veneering in hot and humid Indian conditions?
Avoid contact cement during hot months or in non-air-conditioned spaces—it fails when applied above 35°C or in high humidity. PVA (white glue) works well for most applications when you can maintain proper clamping pressure for 4–8 hours. For better moisture resistance, use synthetic resin adhesives specifically formulated for veneering. Urea-formaldehyde adhesives work well but require heat pressing. Epoxy-based adhesives provide excellent bonds but are expensive and less reversible if repairs are needed. Always do a test bond on scrap material with your specific veneer and substrate combination before committing to the full project.
Why is my veneer showing bubbles after a few weeks of installation?
Bubbles appearing after installation typically indicate trapped moisture or adhesive failure. Common causes include: moisture in the veneer or substrate at bonding time, insufficient pressing pressure during bonding, adhesive applied outside its working temperature range, contaminated substrate surface preventing proper adhesion, or veneer stored in humid conditions before use. To prevent this, ensure both veneer and substrate are at equilibrium moisture content for your environment, press thoroughly with appropriate pressure, work within adhesive manufacturer's temperature guidelines, and clean substrates properly before bonding. Small bubbles can sometimes be fixed by injecting fresh adhesive through a pinhole and re-pressing.
Is pre-finished veneer better than raw veneer for home furniture?
Neither is universally better—the choice depends on your priorities. Pre-finished veneer saves significant time and ensures consistent factory-quality finish, making it ideal for commercial projects, wall panels, or situations where skilled finishing labor is unavailable. However, pre-finished veneer limits your color options, may show seams more prominently, and is harder to touch up if damaged. Raw veneer allows custom staining, color matching with existing furniture, and seamless multi-panel finishing, but requires skilled application, dust-free conditions, and more time. For prominent furniture pieces where appearance is critical, raw veneer with professional site finishing typically yields superior results.
How long does veneered furniture typically last in Indian conditions?
With proper selection, installation, and maintenance, veneered furniture can last 15–25 years or more in Indian conditions. Longevity depends heavily on substrate quality (high-density, calibrated boards last longer), adhesive selection (moisture-resistant adhesives for humid climates), edge and back sealing (prevents moisture ingress), finish quality and maintenance (periodic recoating protects the surface), and usage patterns (heavy wear reduces lifespan). Furniture in air-conditioned environments generally lasts longer than in non-climate-controlled spaces. Common failure points are edges and areas near moisture sources—addressing these in design and maintenance significantly extends service life.
What is the difference between natural veneer and reconstituted veneer?
Natural veneer is sliced directly from a log and retains the authentic grain, color, and character of that specific tree. Each sheet is unique, with natural variations. Reconstituted (engineered) veneer is made by dyeing and reconstructing fast-growing wood species to mimic the appearance of premium woods. It offers consistent color and pattern across sheets, which simplifies matching but lacks the depth and authenticity of natural wood. Reconstituted veneer is typically less expensive and environmentally friendlier (uses plantation species), but purists prefer natural veneer for its genuine character. Both can be high quality—the choice depends on aesthetic priorities and budget.
Can I apply veneer myself as a DIY project?
Applying veneer successfully requires skill, proper tools, and controlled conditions. Small projects like covering a box or small table are achievable for beginners using paper-backed veneer and contact cement or iron-on veneer. Larger projects involving grain matching, multiple panels, or curved surfaces require experience with proper pressing equipment (vacuum bags or veneer press), adhesive selection, and finishing techniques. Common DIY failures include bubbles from inadequate pressing, cracks from improper storage, mismatched grain, and poor edge treatment. If you're new to veneering, start with a practice project on scrap material before attempting visible furniture. Consider professional application for investment pieces.
How should I store veneer sheets before use to prevent damage?
Store veneer flat on a clean, level surface—never stand sheets upright as this causes warping and edge damage. Place a flat board underneath and on top, with evenly distributed weight to keep sheets flat. Keep away from direct sunlight, heat sources, and humidity extremes. Ideal storage is in an air-conditioned space with stable humidity around 45–55% relative humidity. Don't store directly on concrete floors (moisture transfer) or near construction activities (dust contamination). In humid climates, plan to use veneer within 1–2 weeks of delivery. If longer storage is necessary, wrap in plastic with desiccant packets and check periodically for mold or moisture damage.
Disclaimer: This content is provided for general informational purposes based on industry practices and publicly available information. Product specifications, standards, prices, and availability may vary by manufacturer, region, and time. Readers should independently verify details with manufacturers, dealers, or qualified professionals before making purchase or construction decisions.Want Plywood Suggestions?
Share a few details and a Duro BOIL specialist will suggest suitable brands and connect you to responsive dealers.